
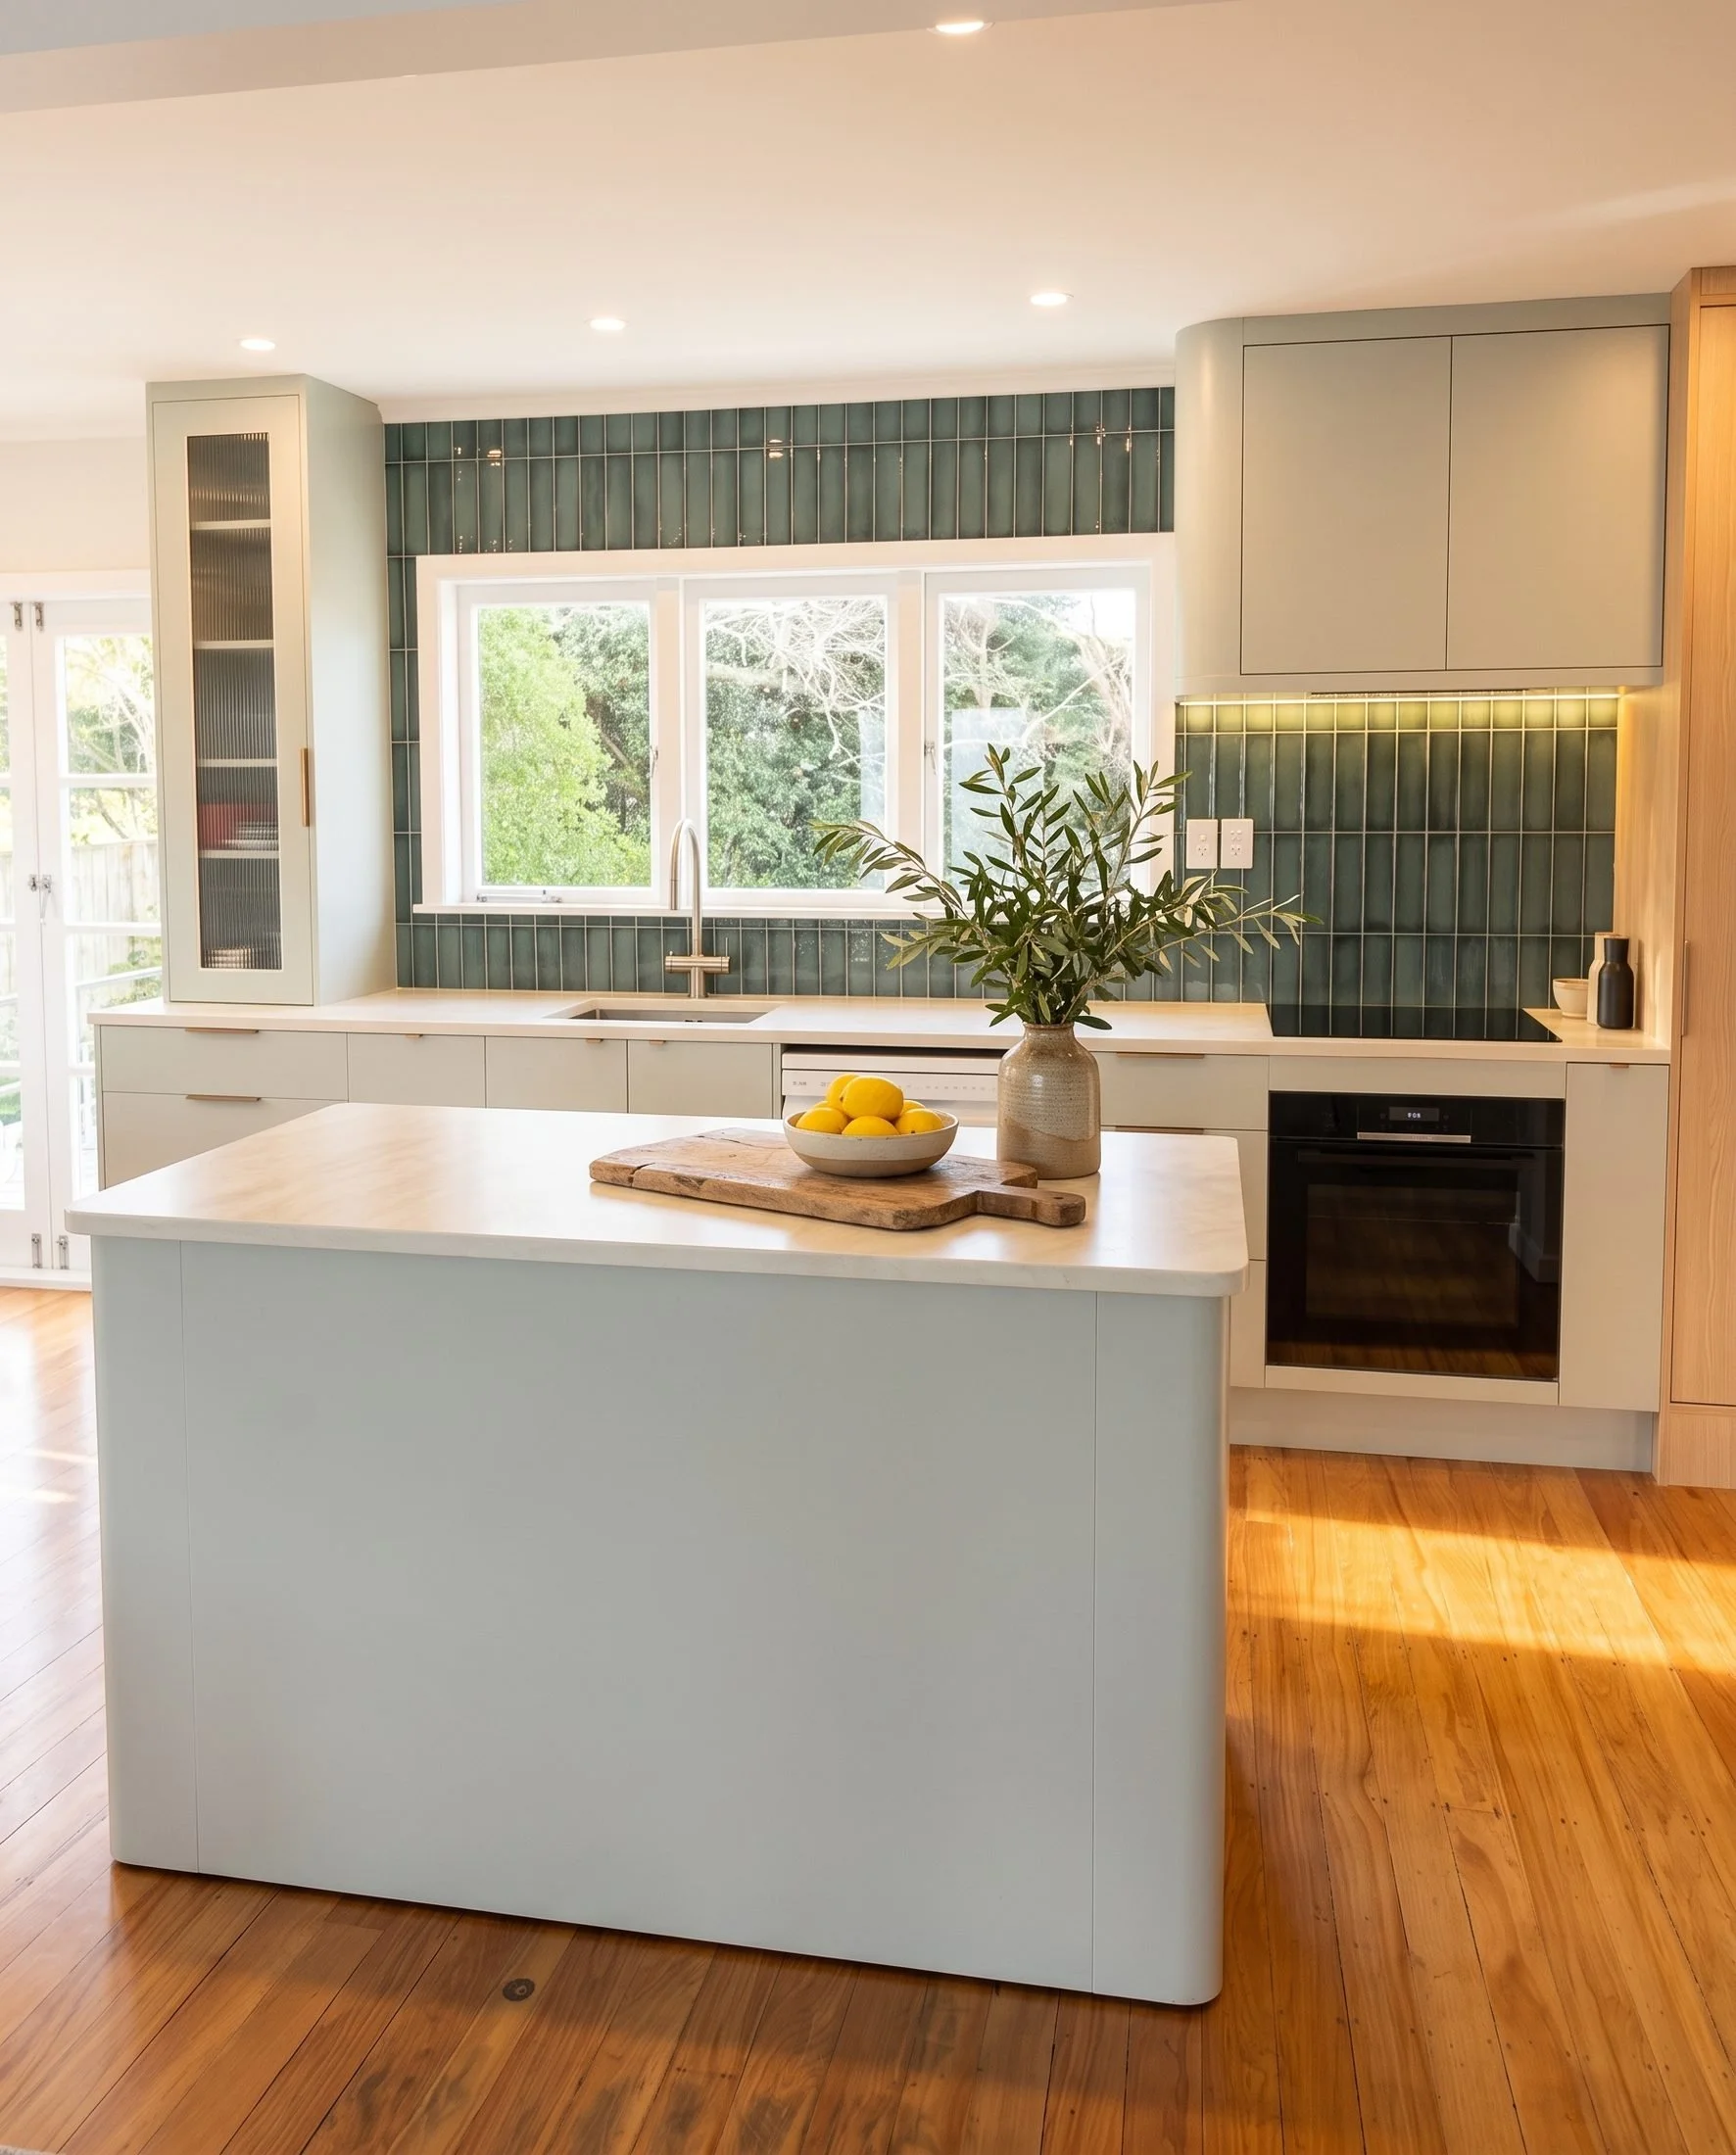
Kitchen Renovation in Belmont: Merani Street
A full kitchen renovation in Belmont, Auckland. The room did not change shape, the walls did not move and the timber floor stayed. Everything else came out.
This is the page to read if you are trying to work out whether you need a bigger kitchen or just a better one. Key Interiors designed and built it start to finish.
Where it started
Nothing was wrong with it, and that is the hard part
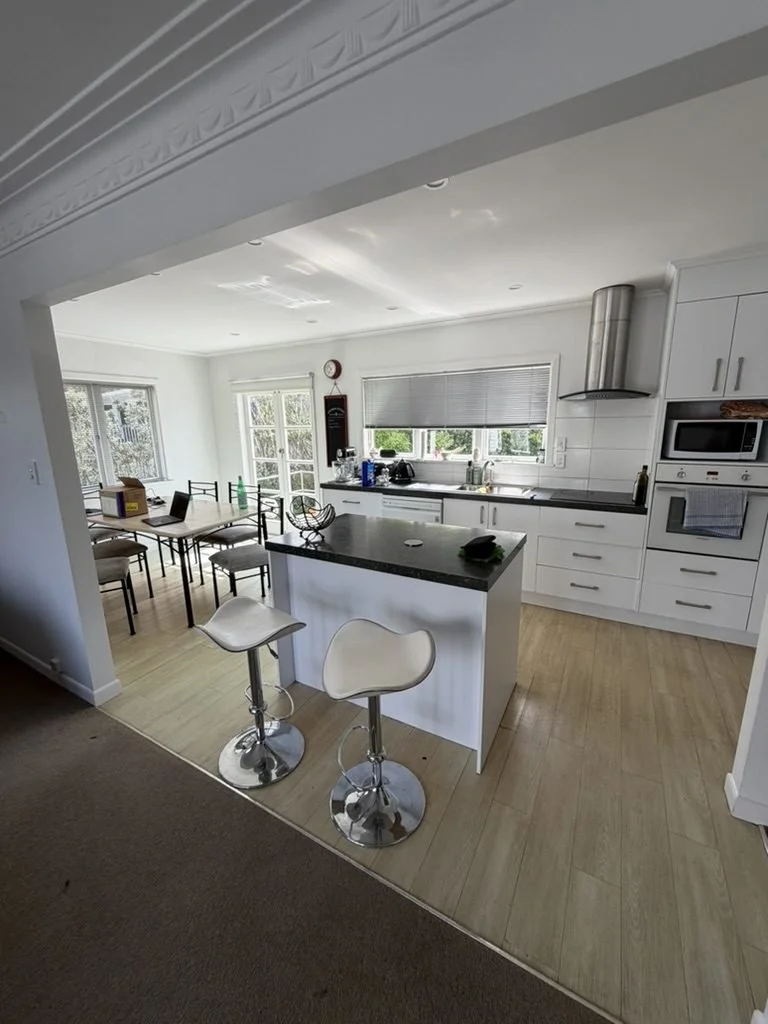
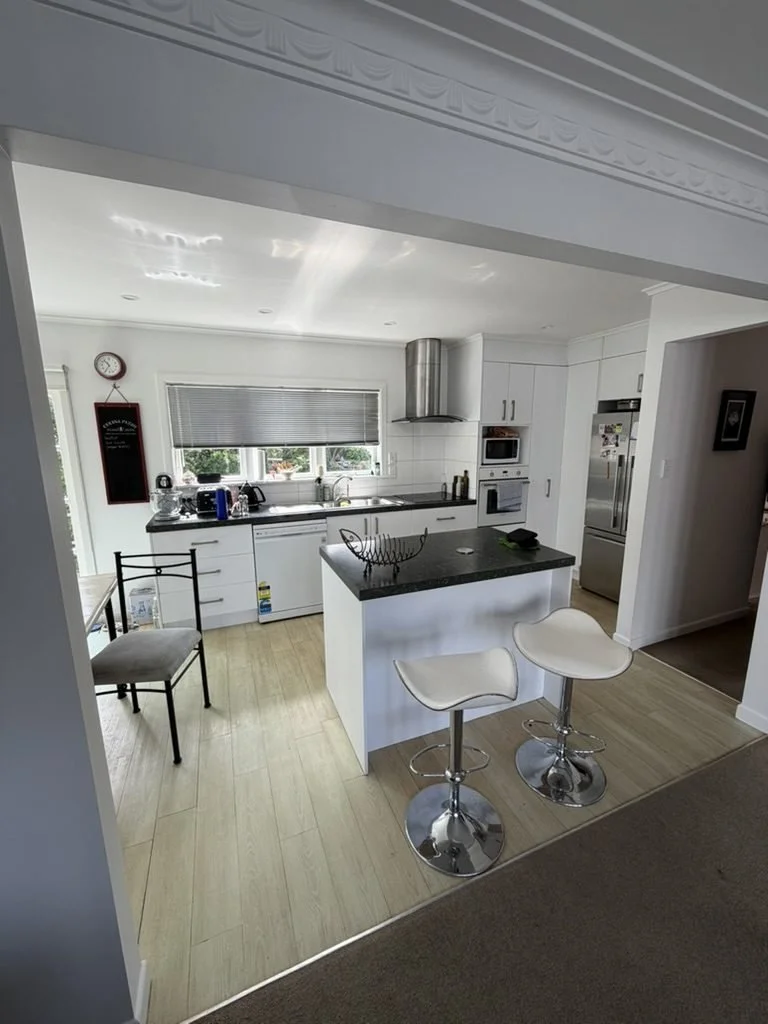
White cabinetry, a dark benchtop, an island with bar stools, stainless appliances and a rangehood. Tidy, functional, and about fifteen years old.
There was no leak, no rot and no fault to point at. That makes the decision harder, not easier, because you cannot justify it with a problem. You have to justify it with what you get.
The decision
We did not move a single wall
The obvious instinct with a dated kitchen is to open it up. Take a wall out, extend, reconfigure. It is also where most of the money goes, and on this job none of it was necessary.
The layout already worked. The island was in the right place, the run had the right length, the light was good. What was wrong was every surface and every colour in the room.
Same footprint, same floor. The colour did the work.
Keeping the footprint means no structural work, no consent, no re-routing the services, and no rebuilding the ceiling. That budget went into joinery, stone and tile instead, which is the part you actually look at.
The build
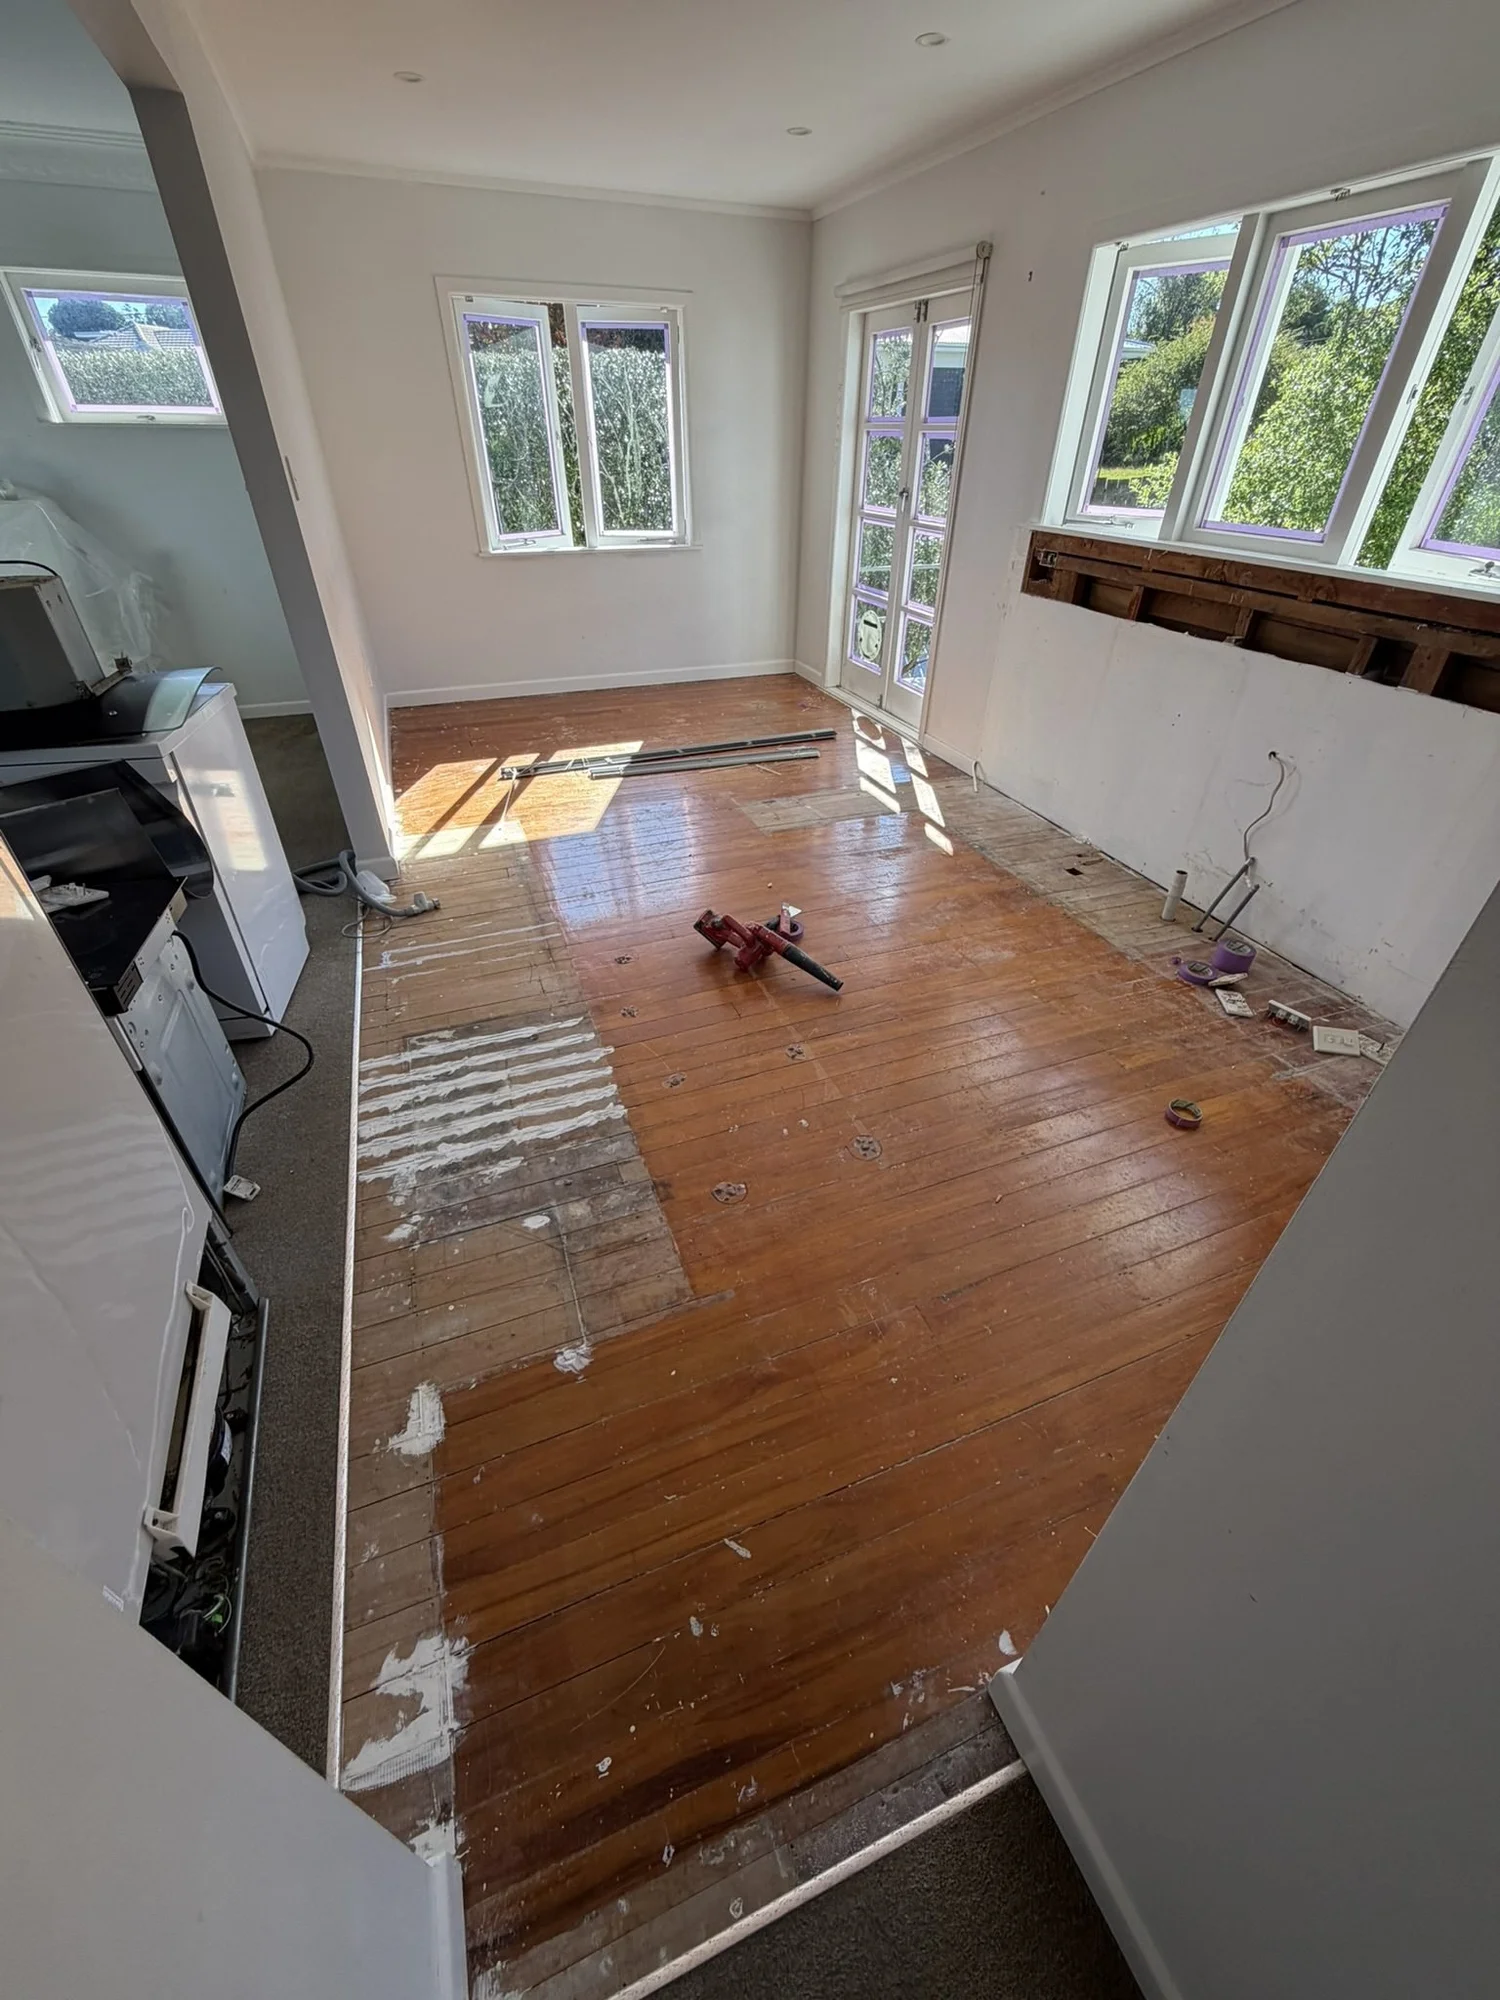
How the Merani Street kitchen went back together
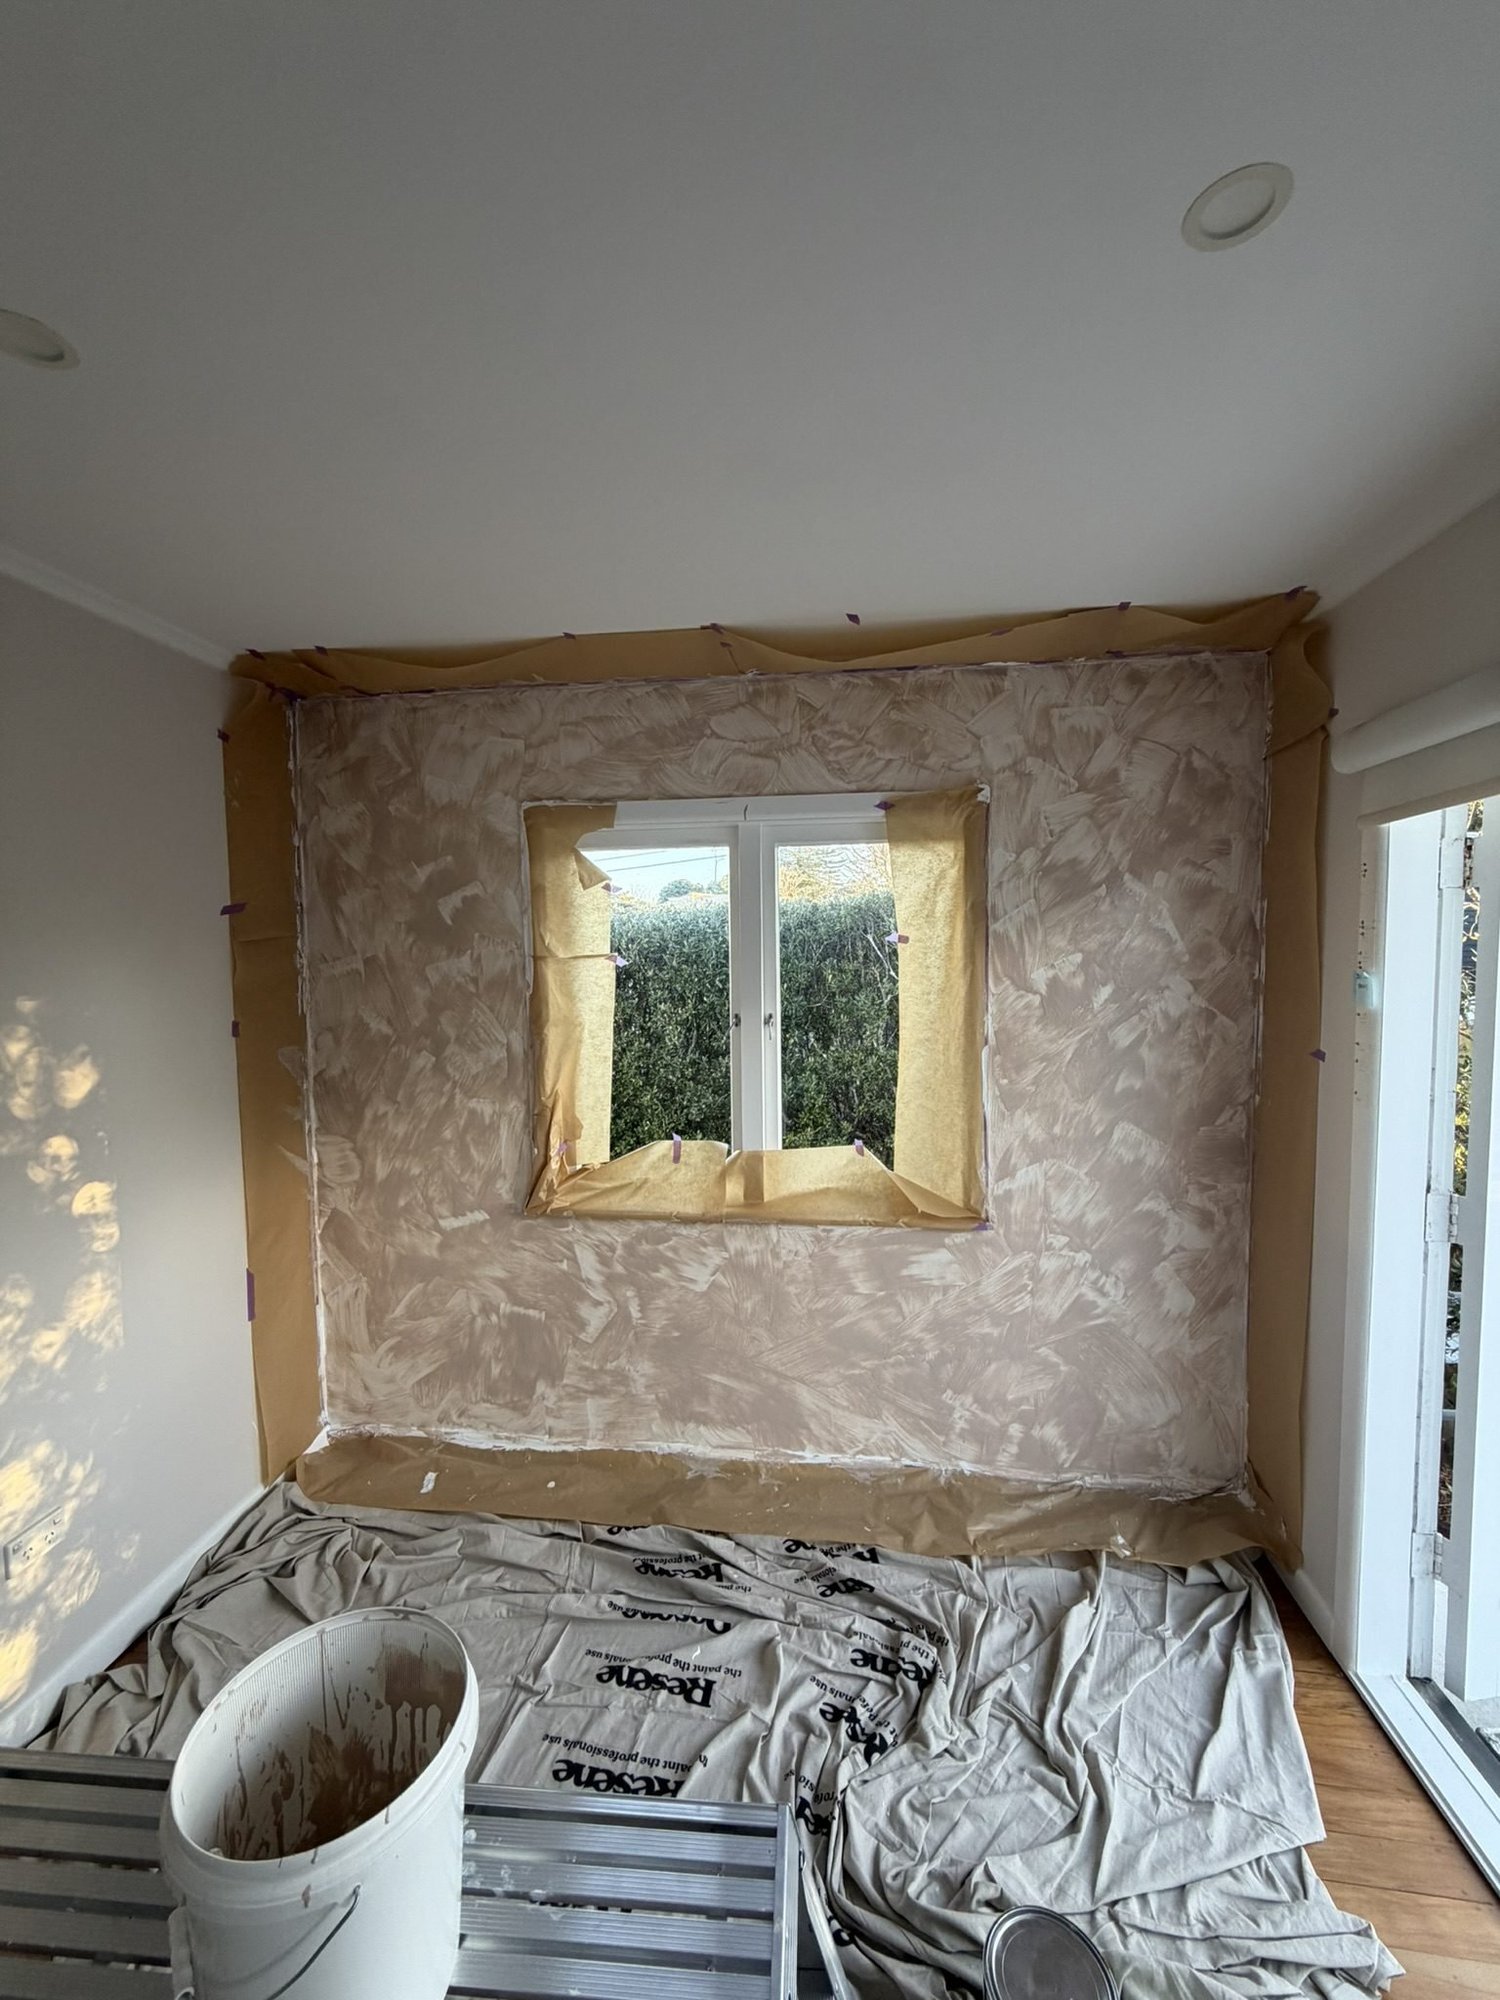
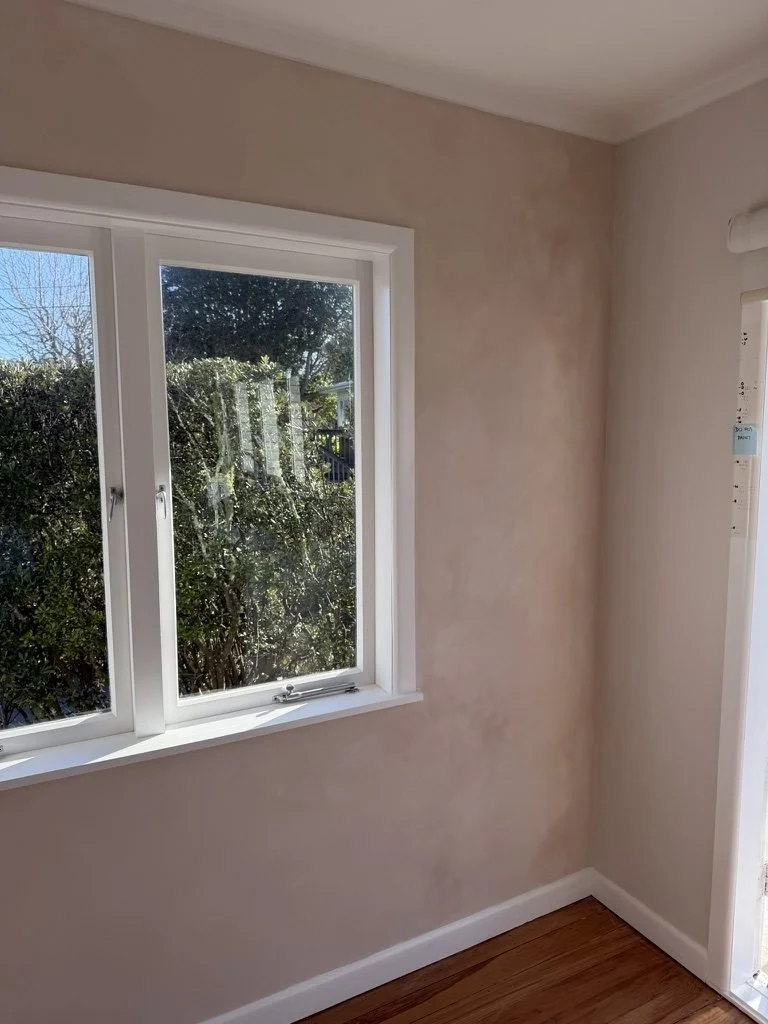
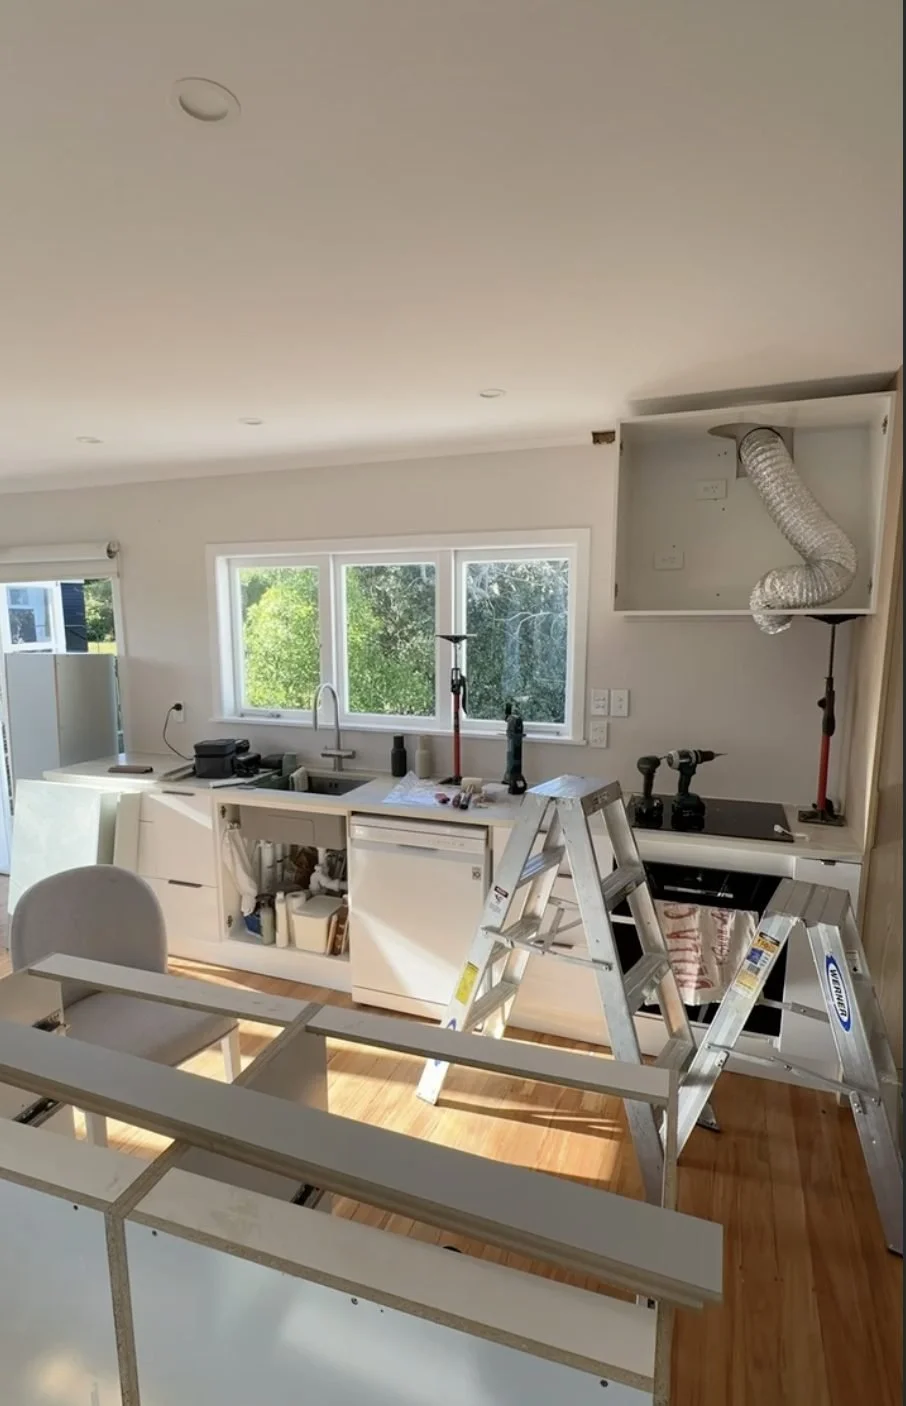
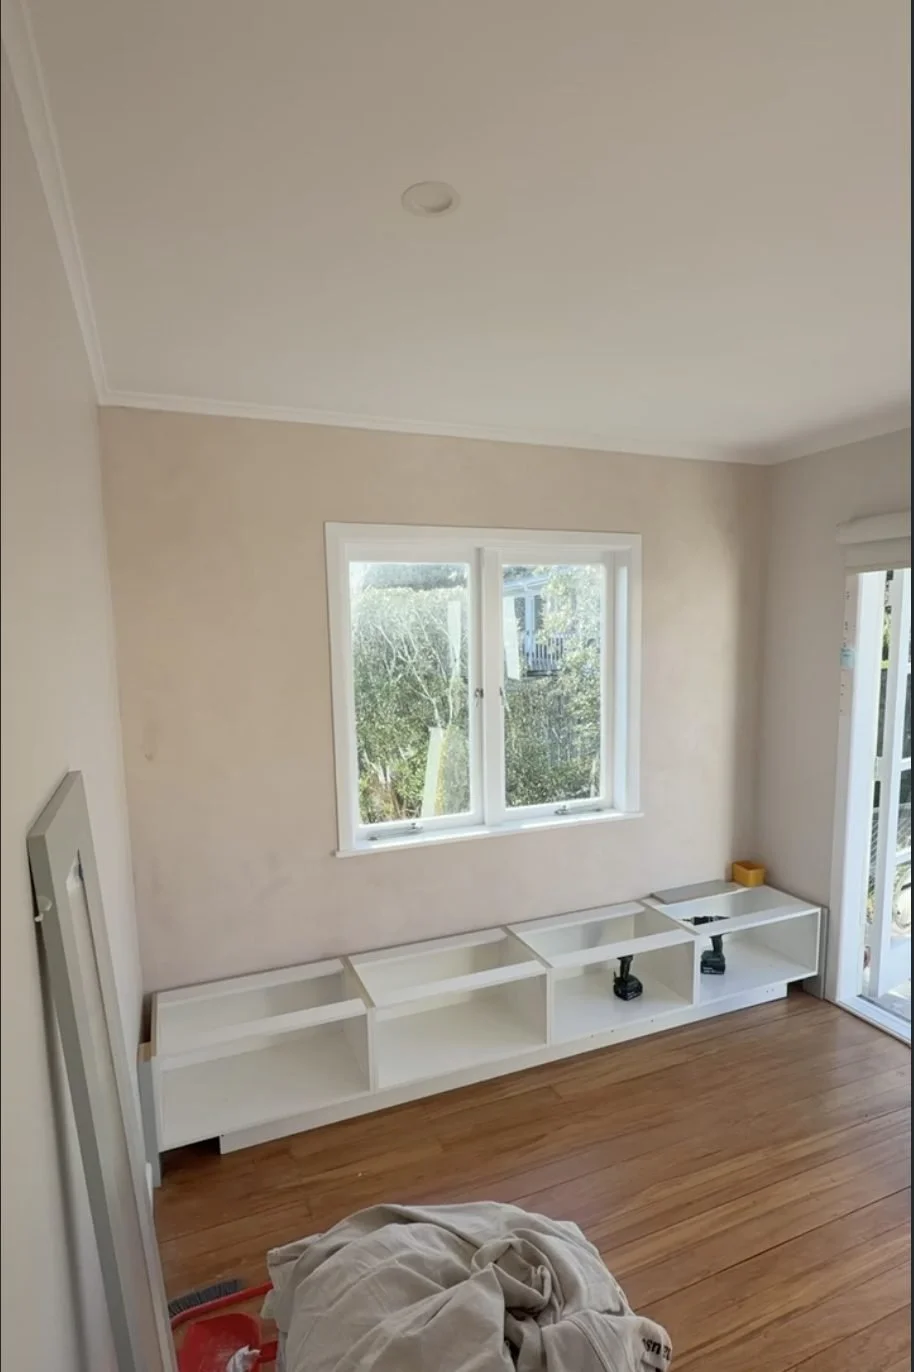
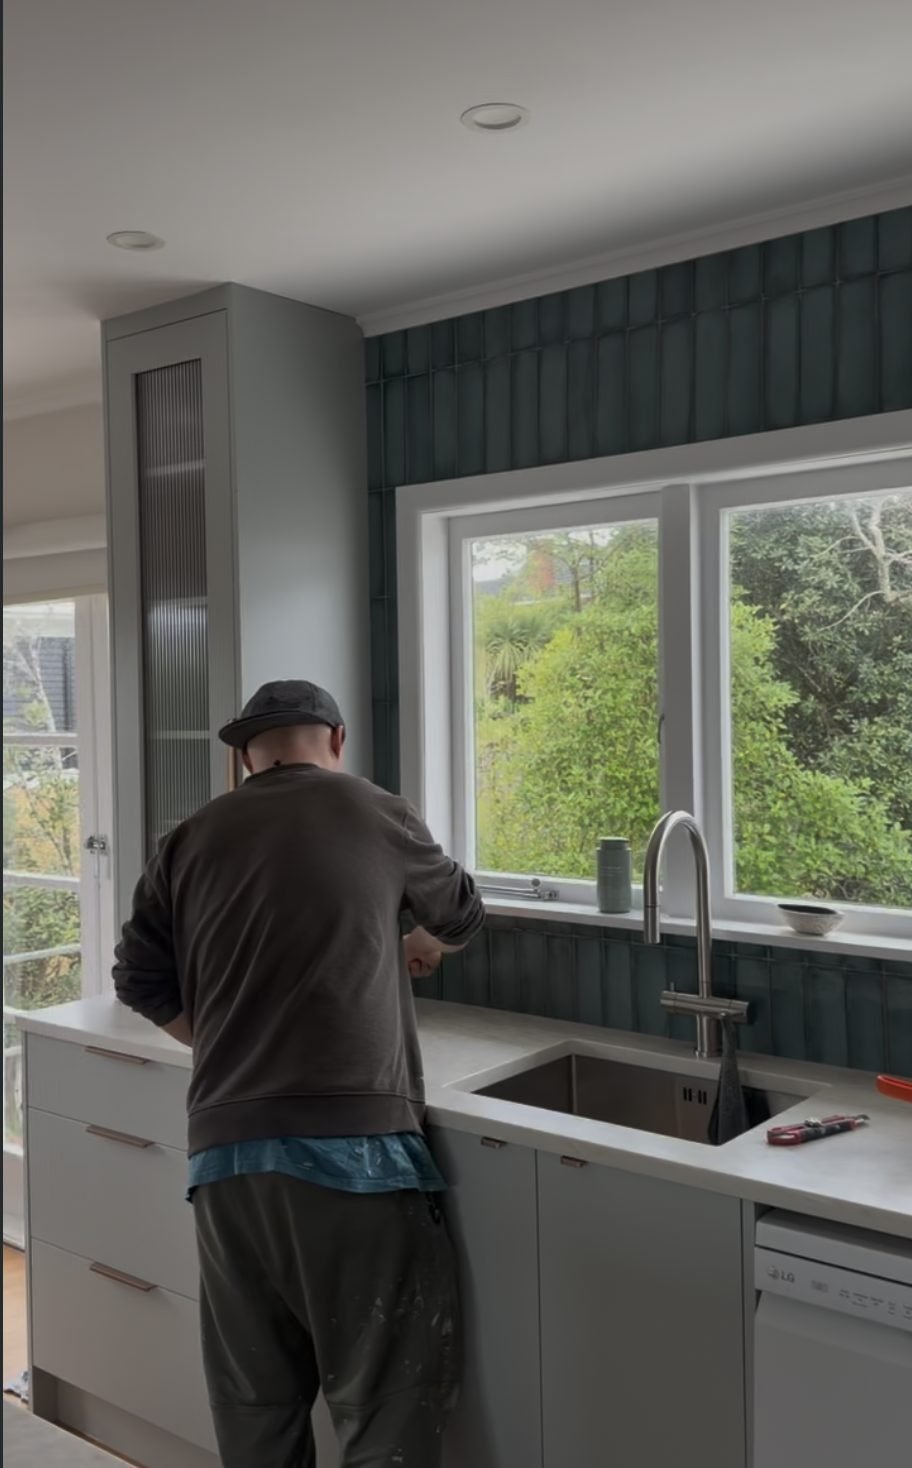
Back to substrate, then plaster. Old splashback and linings off, walls made good, sanded and prepped. A gloss tile shows every undulation behind it, so a flat wall is not optional here.
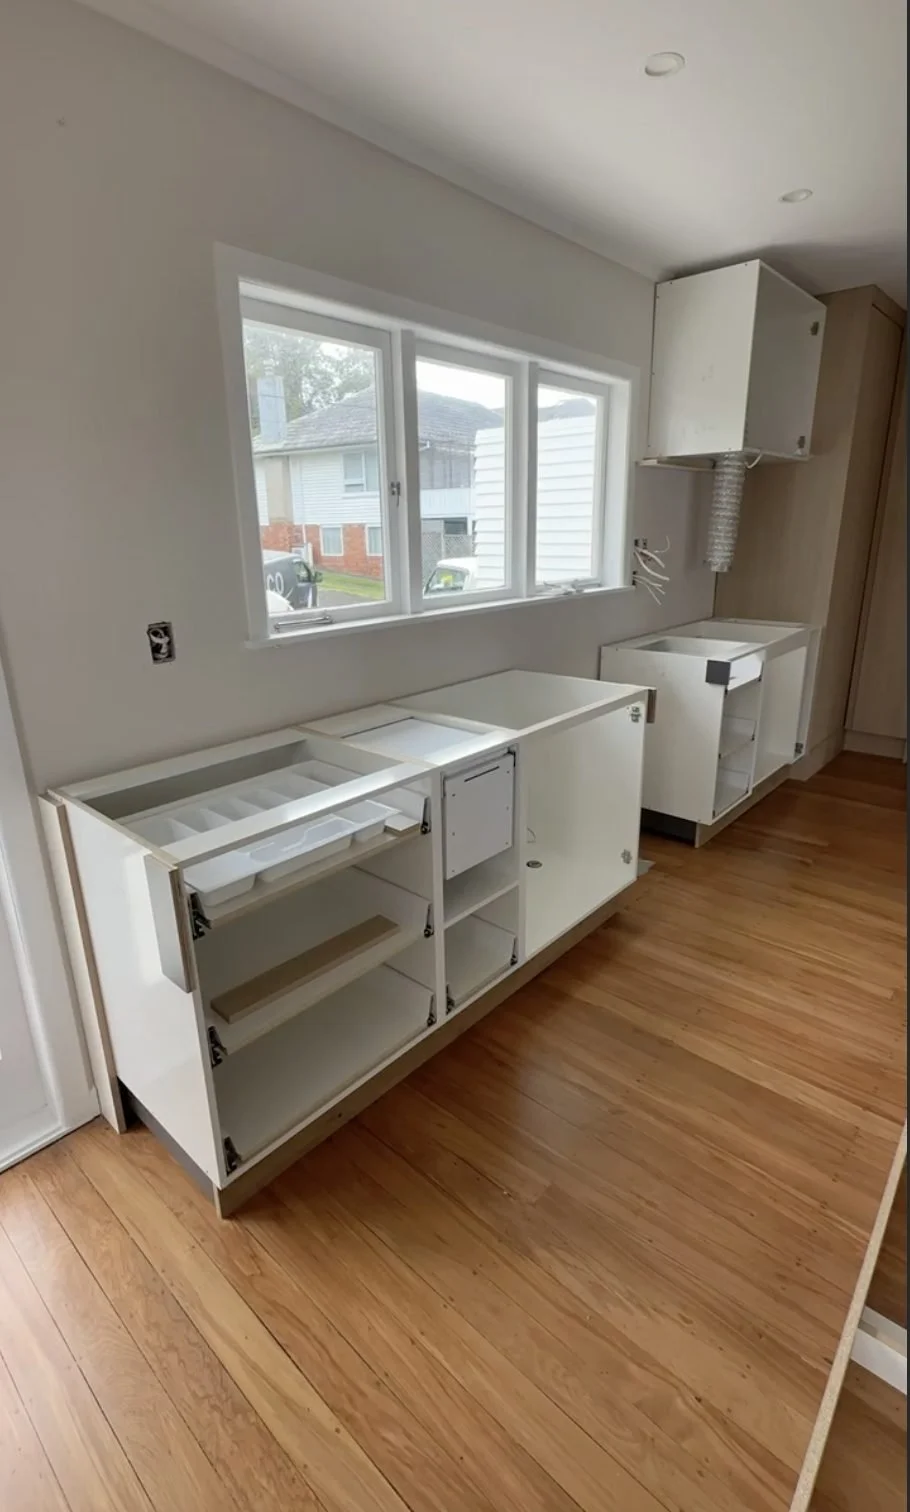
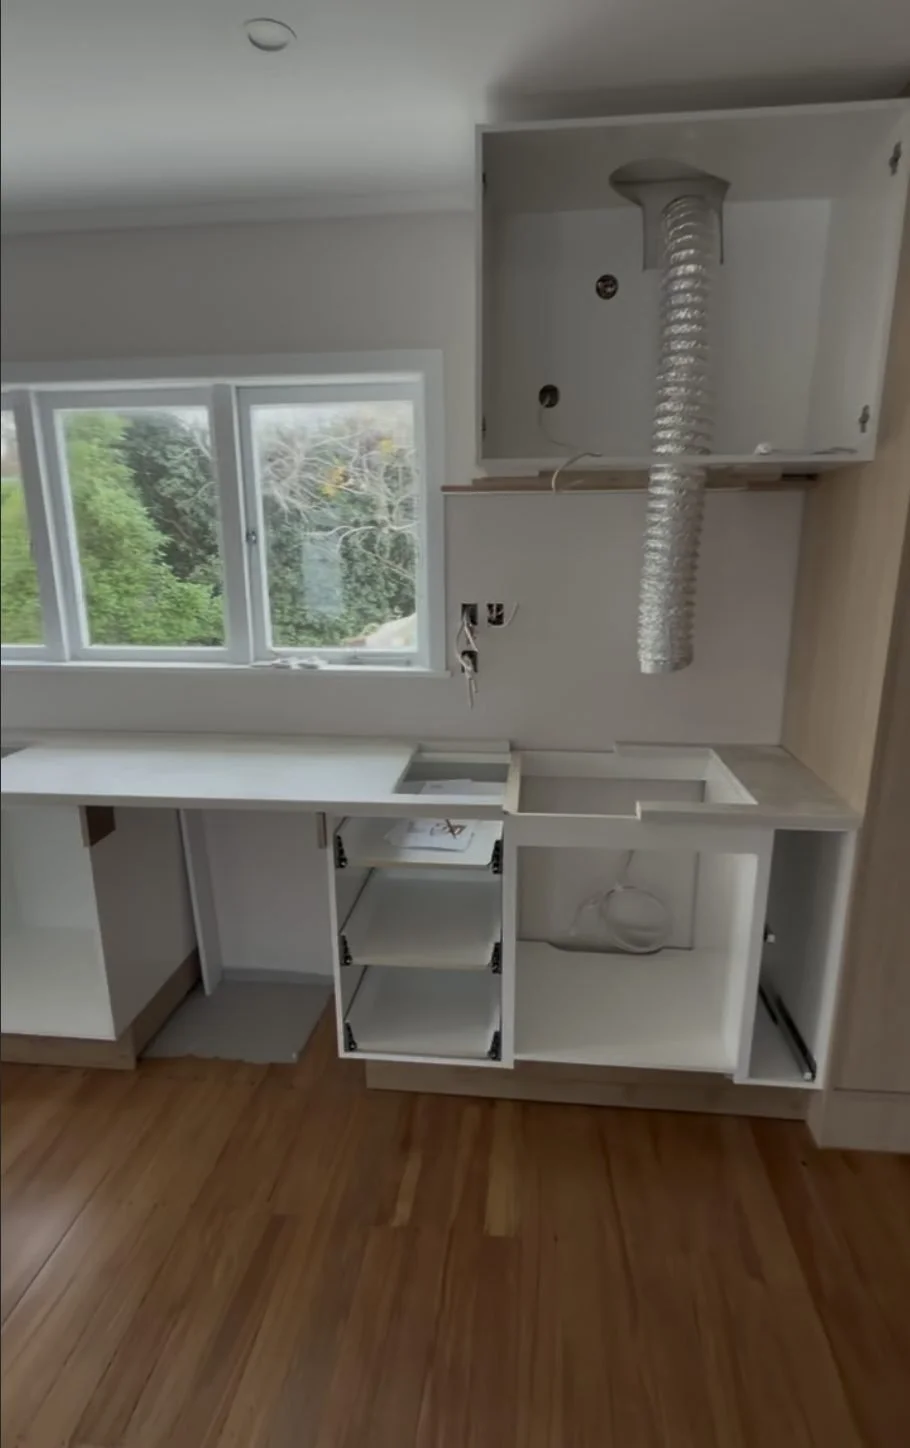
Then the carcasses. Cabinetry goes in as boxes before any fronts, and this is the stage that decides everything downstream. If the boxes are not level and square, the benchtop will not sit, the doors will not line up and the tile will not run true.
Then the services. Extraction ducted up through the ceiling and out, not recirculated into the room. In a kitchen that opens onto living, that is the difference between cooking and everyone smelling it all evening.
Then paint, tile, stone and fit-off. In that order, because each one is harder to protect than the last.
The tile
The green is the entire decision
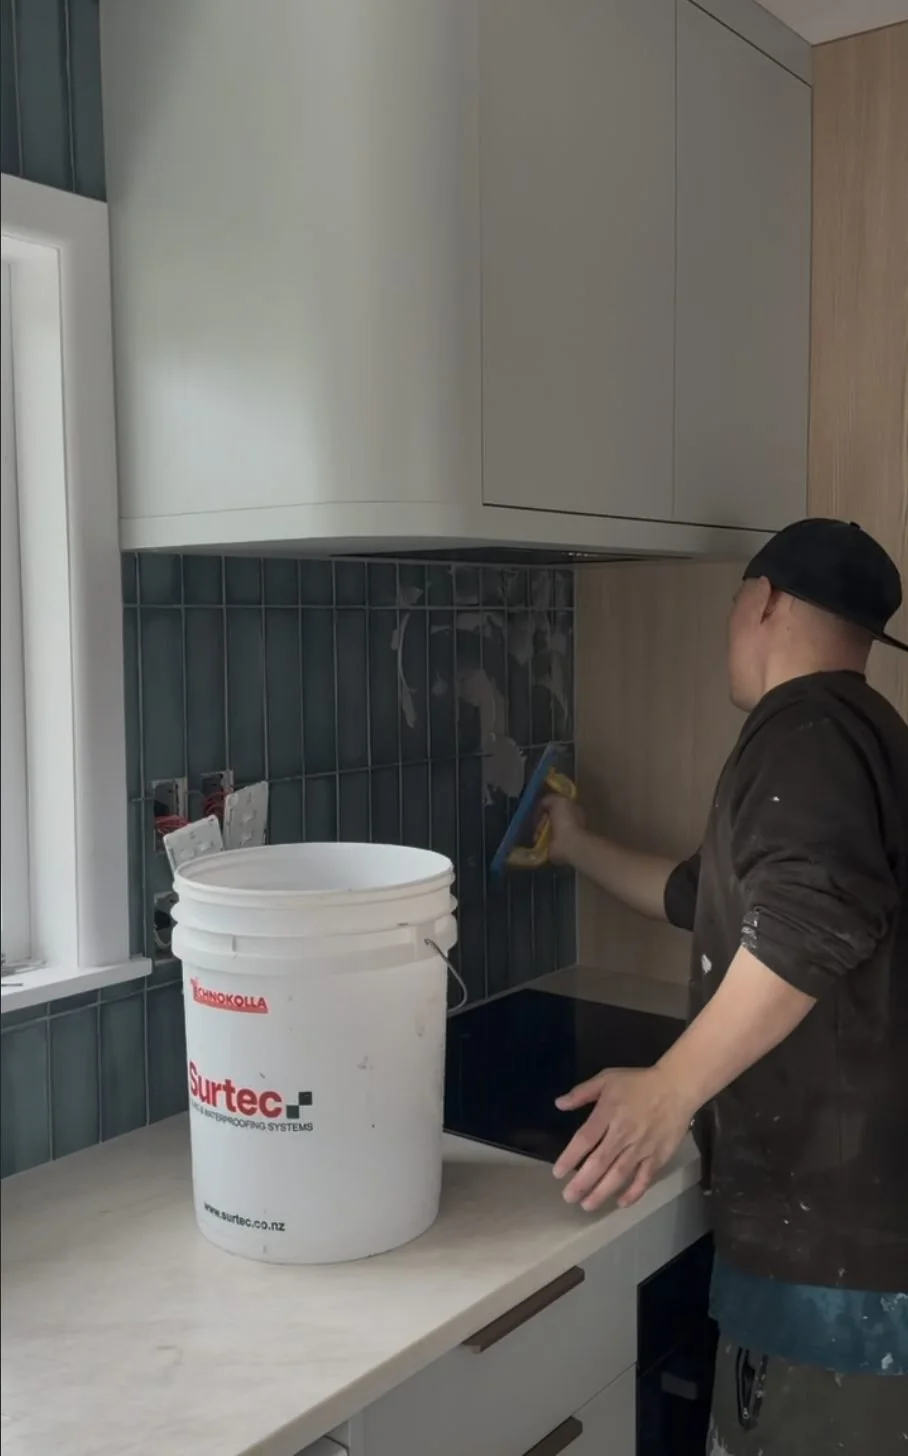
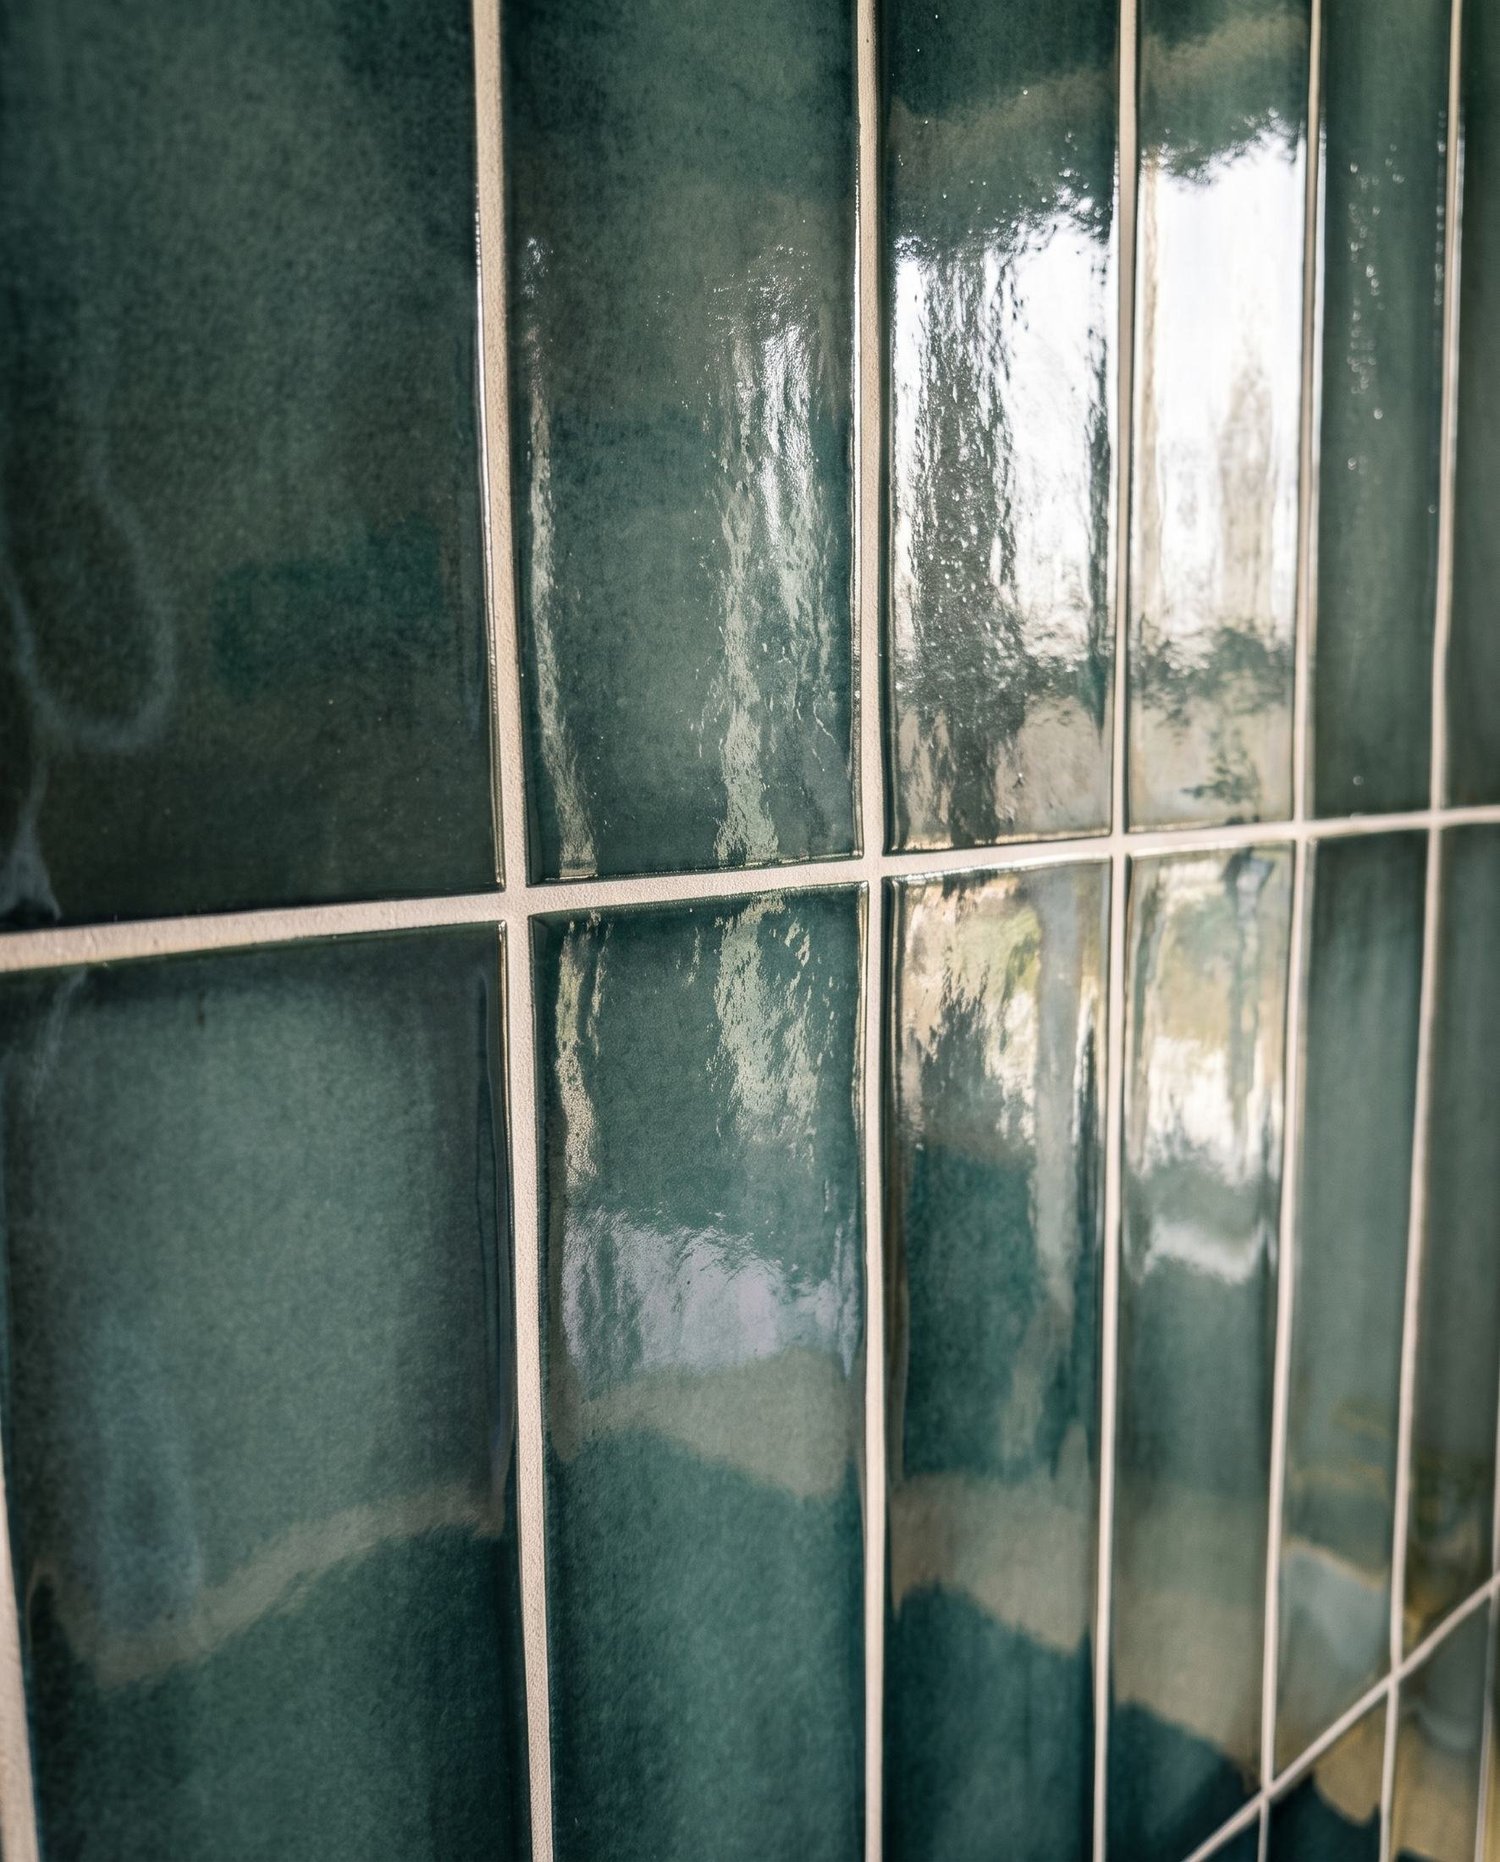
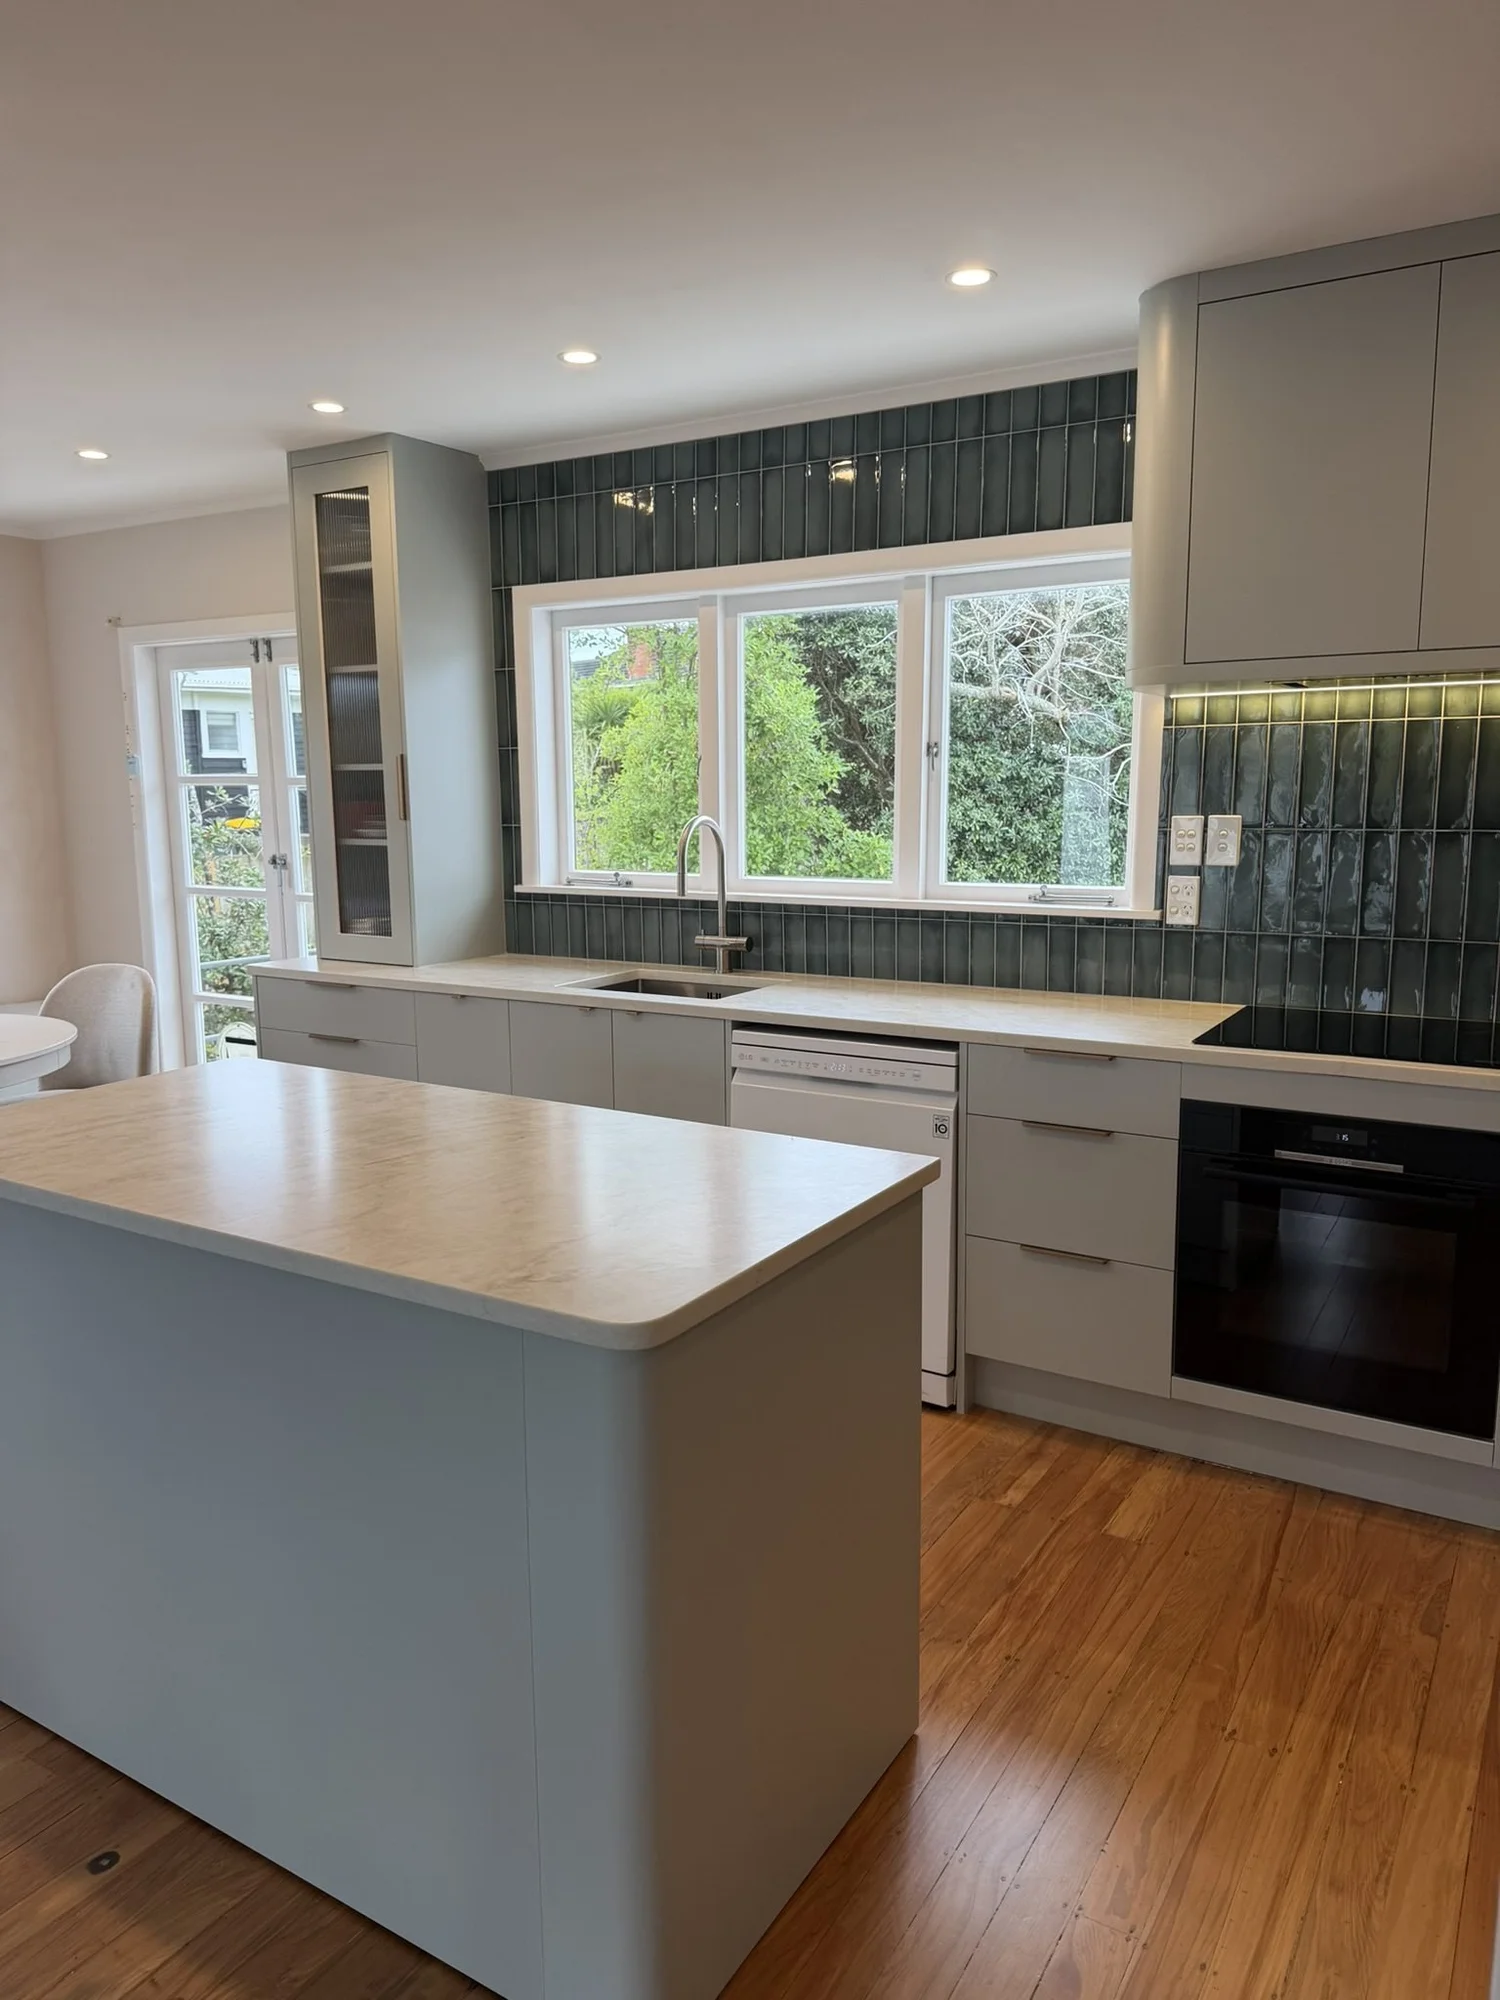
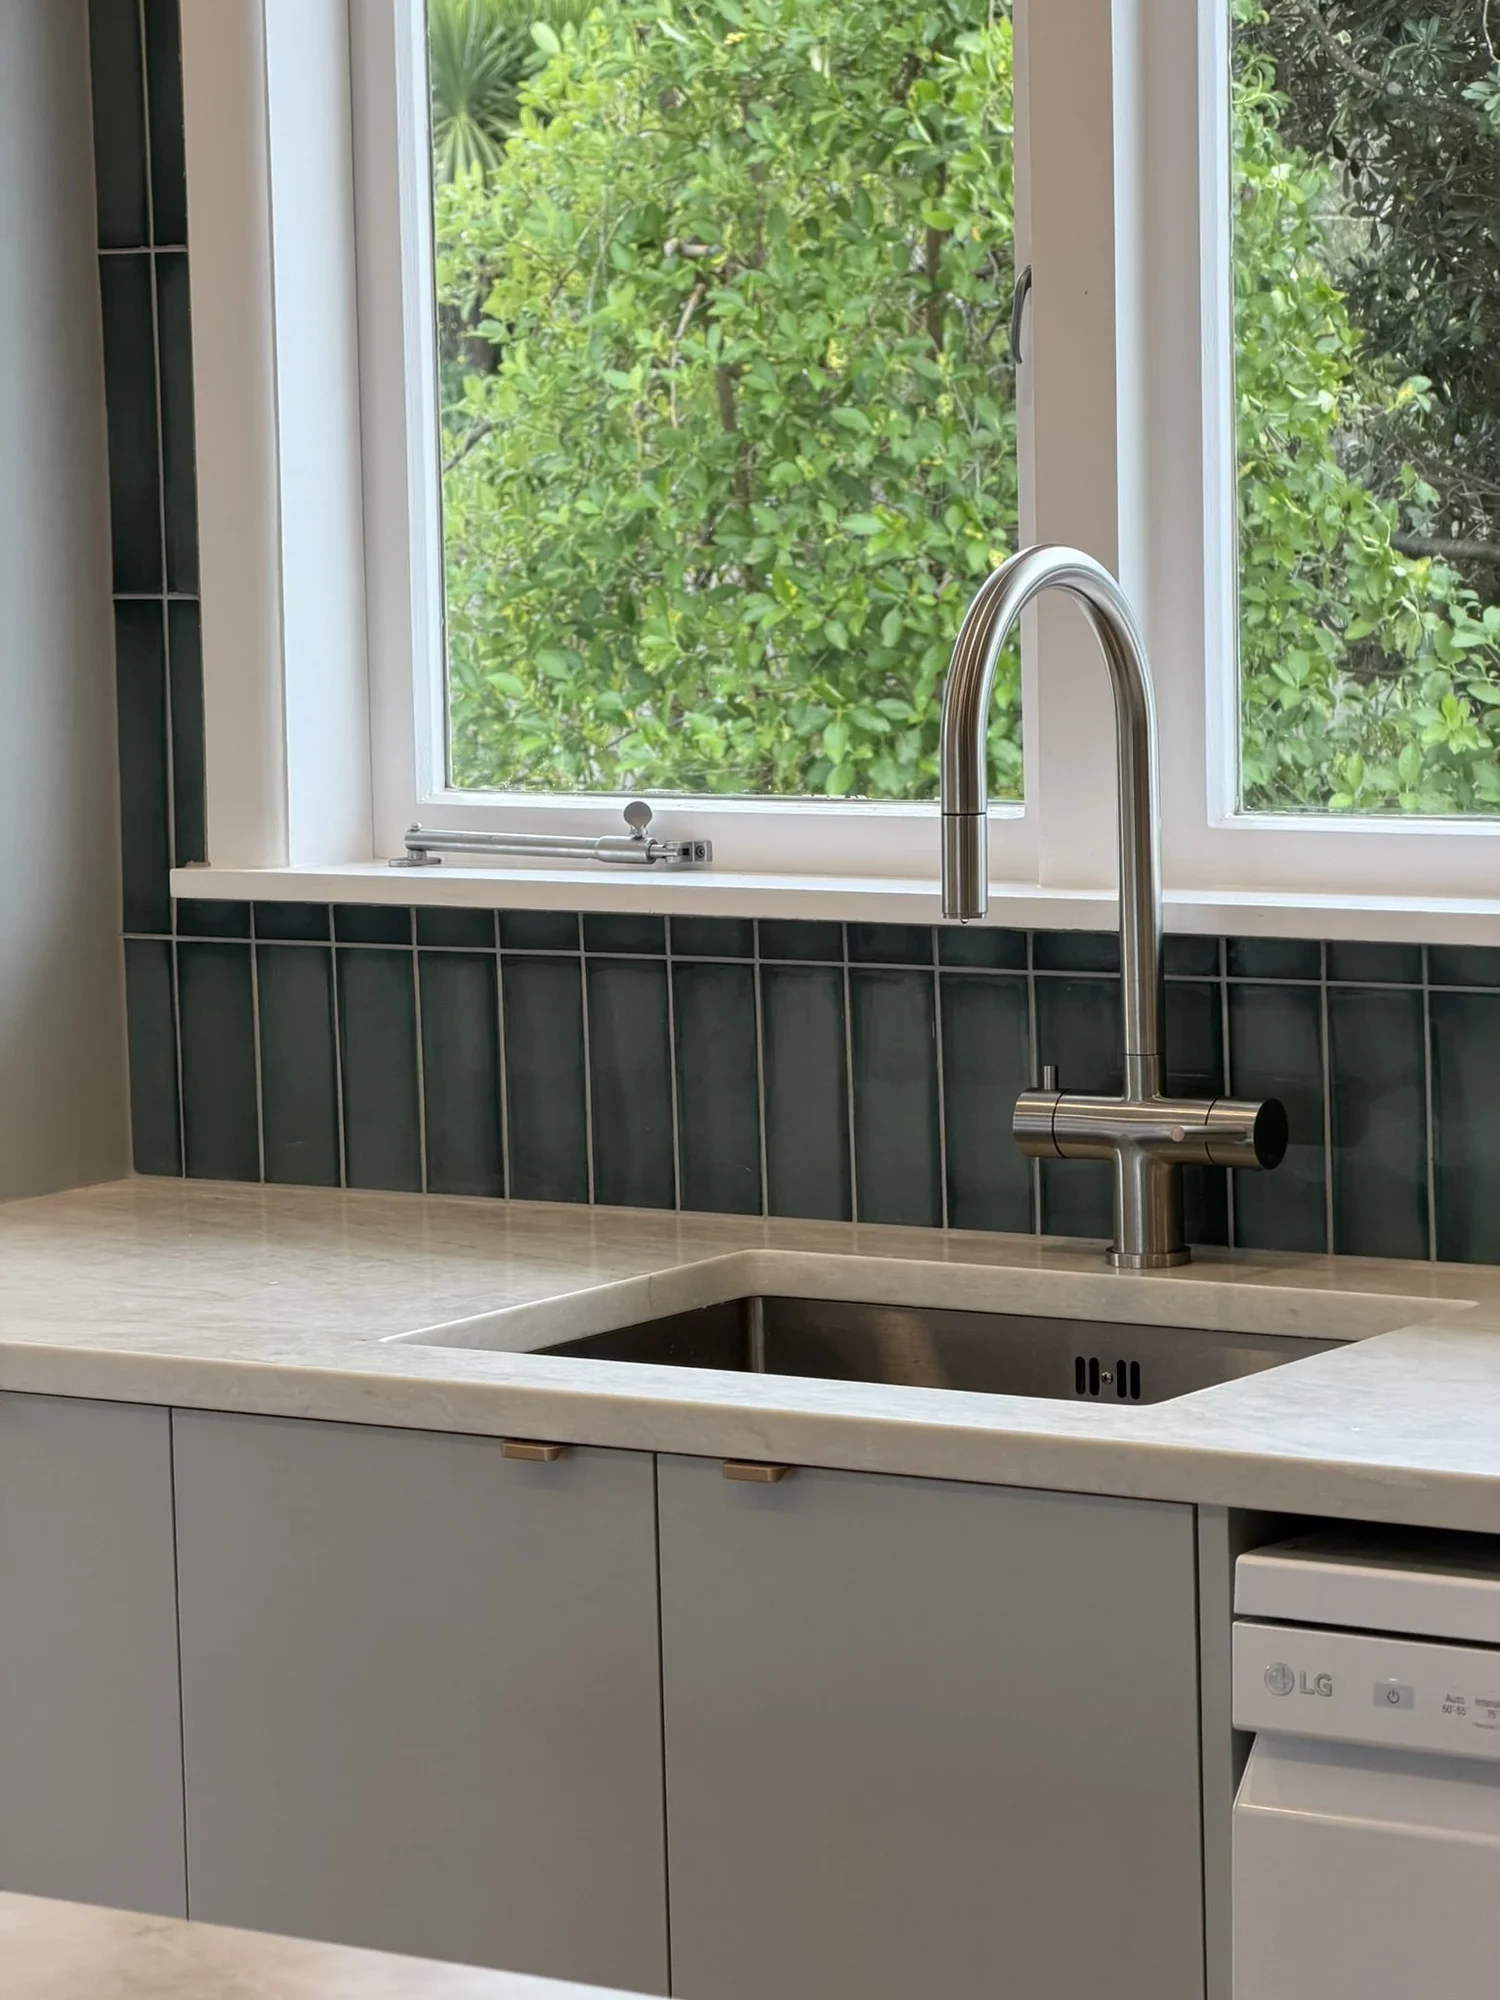
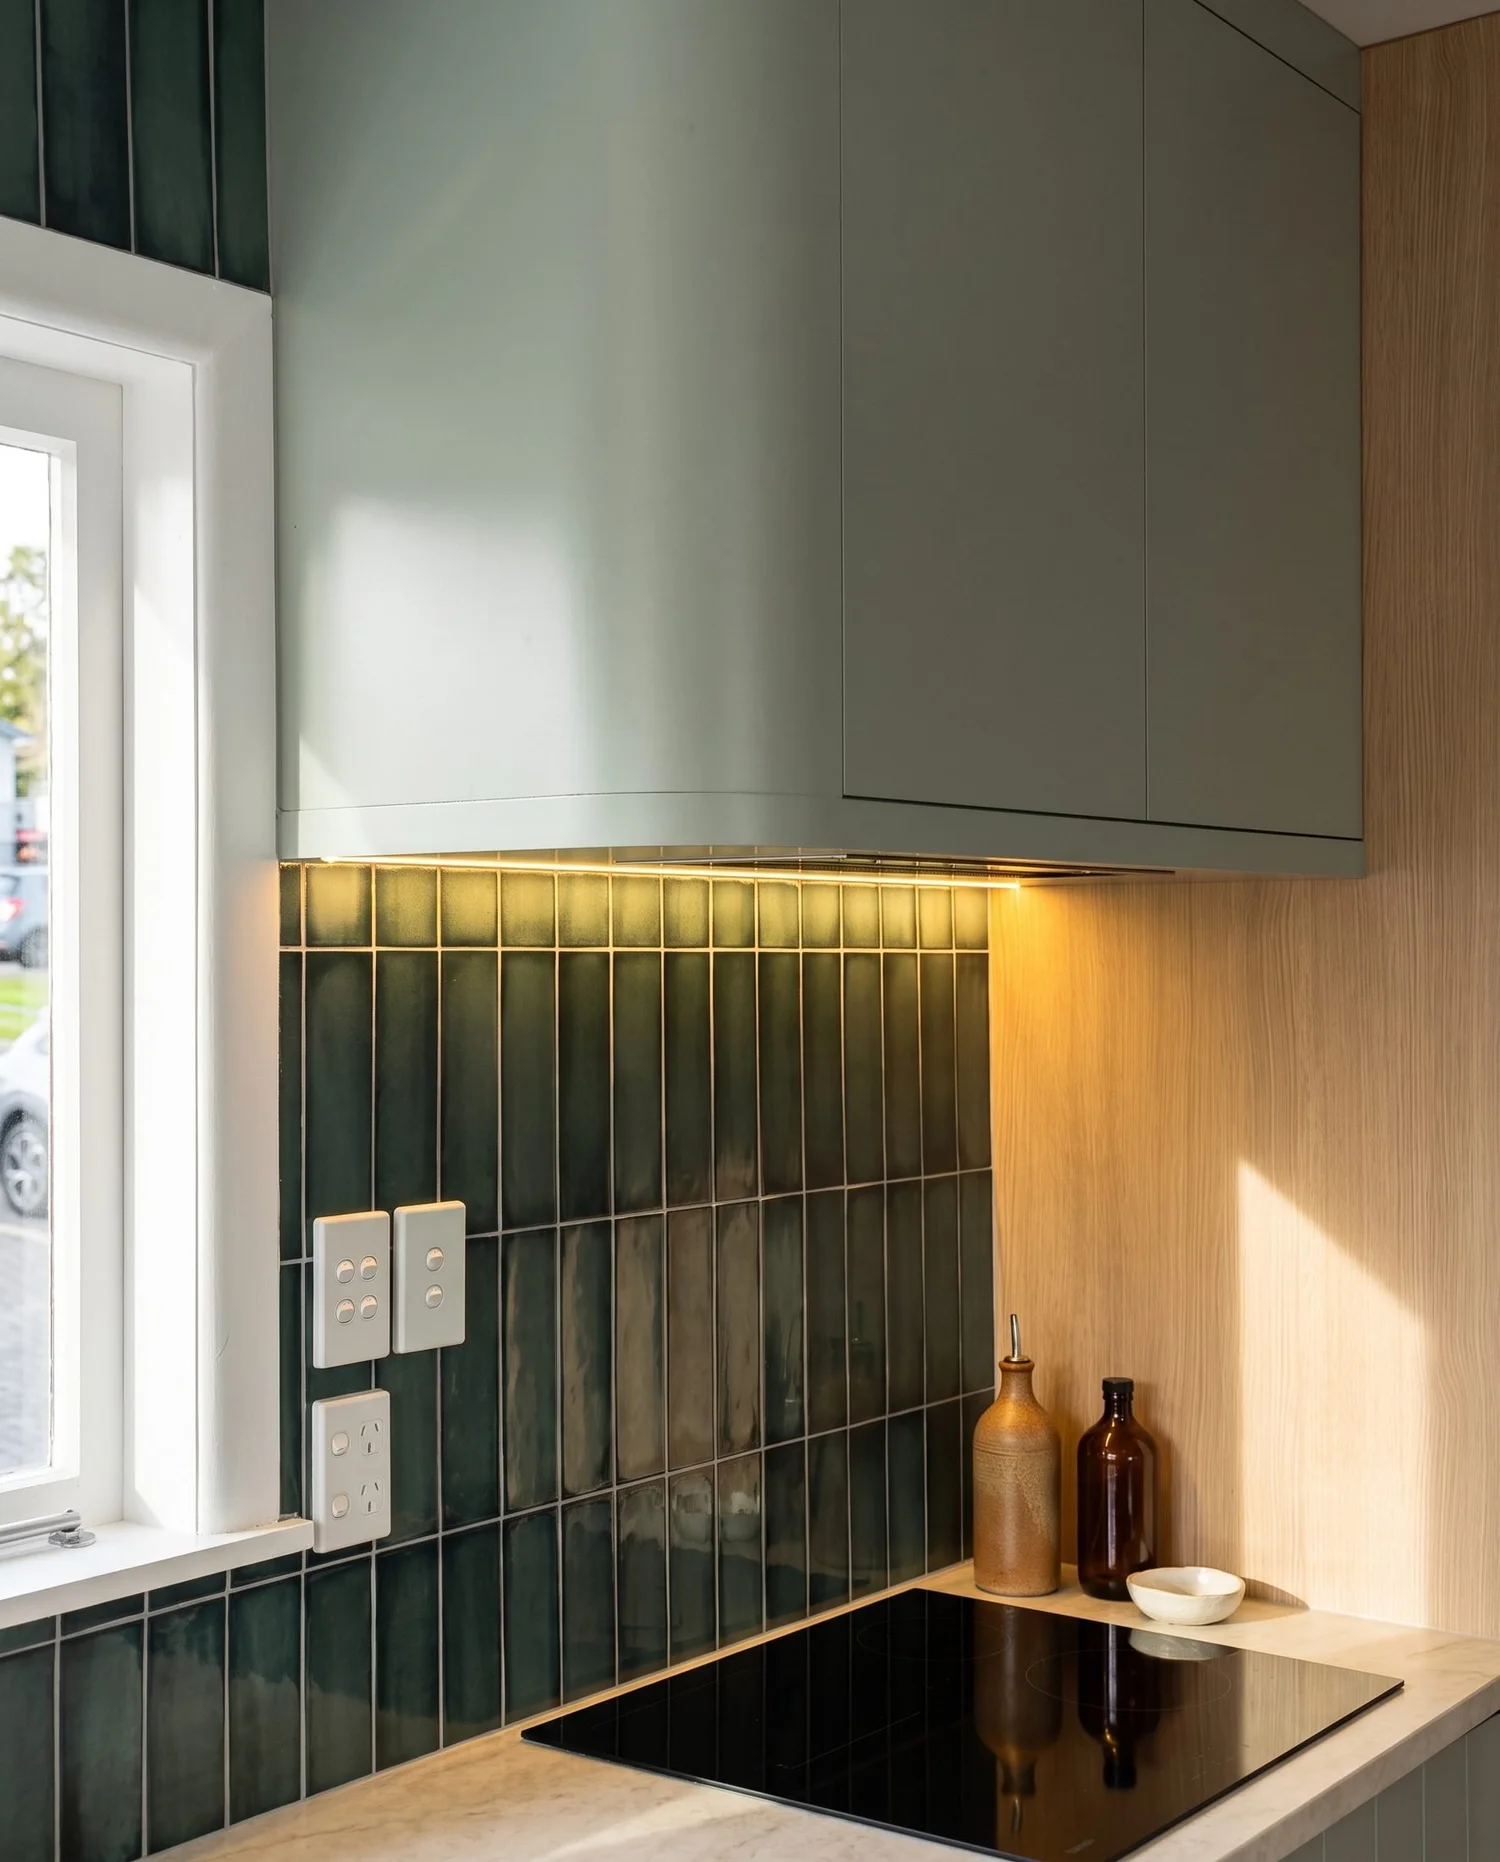
Dark green vertical stack-bond gloss, run from bench to underside of the uppers. It is the one thing in the room doing any talking, and it is the reason the kitchen reads as considered rather than replaced.
Vertical stack bond is less forgiving than a standard offset. The joints line up top to bottom, so any drift in the setting out shows as a bent line down the whole wall. It gets set out dry before anything is stuck.
The glaze is uneven on purpose, so the wall shifts between green, teal and near-black depending on where the light is coming from.
The fit-off
Stone, then tapware, then done
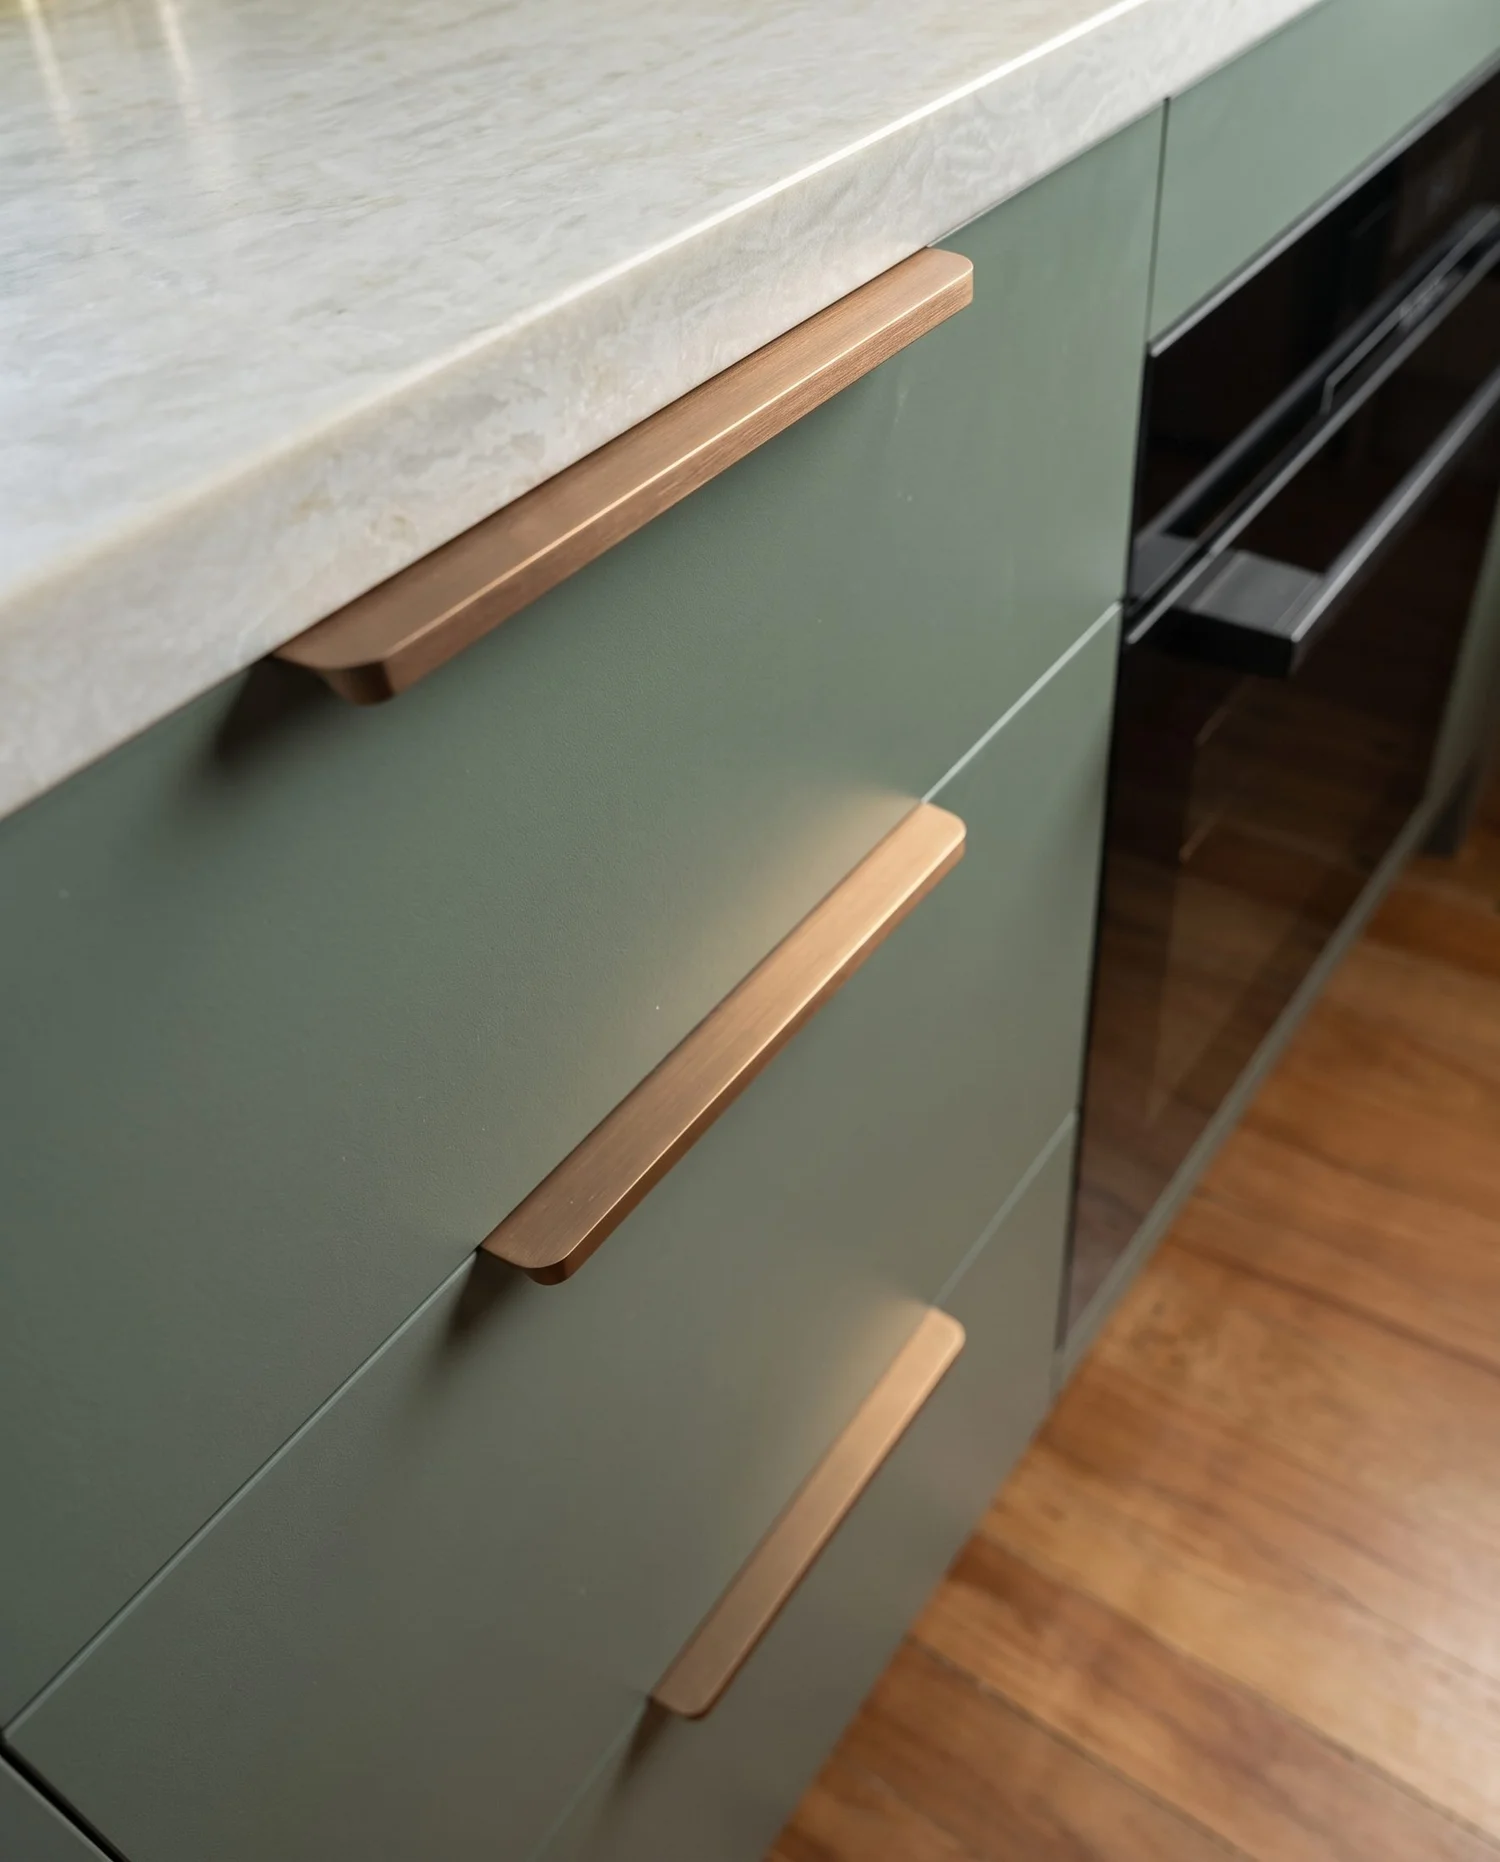
Cream stone benchtops with a waterfall end on the island, an undermount sink, a brushed gooseneck pull-down mixer and a black glass cooktop. Bar-pull handles on the sage fronts.
The stone goes on after the tile so the splashback lands on a finished edge, and the tapware goes in last because it is the thing most likely to get marked.
The bit worth stealing
A window seat costs less than a cabinet run and gets used more
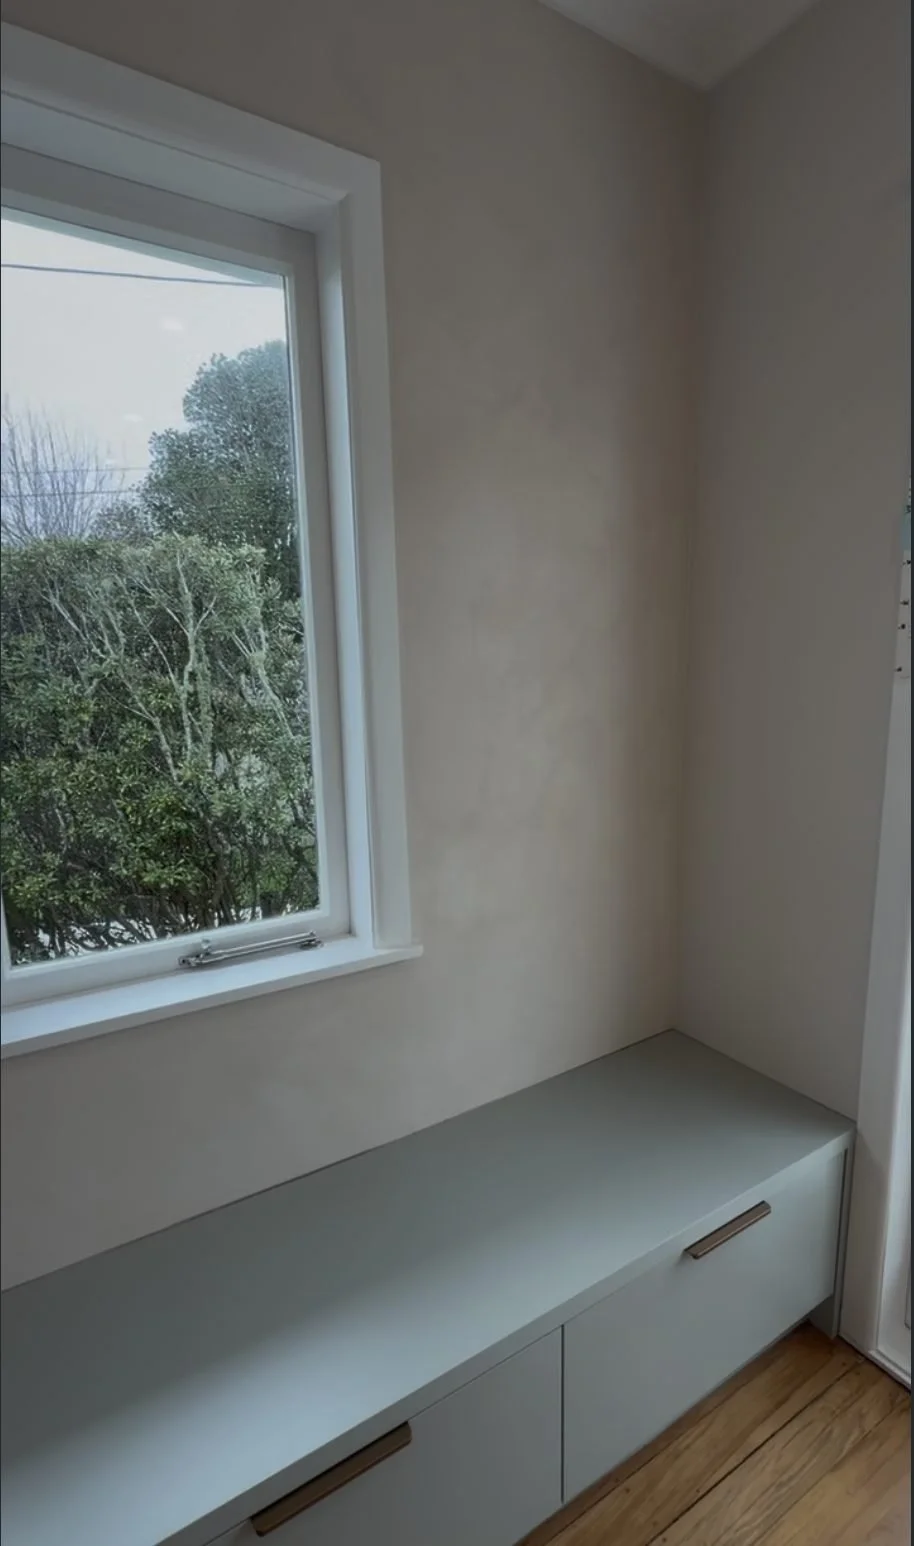
The bay at the end of the room was doing nothing. It became a built-in bench with storage underneath, made from the same carcass stock as the kitchen and finished to match.
It is the cheapest joinery in the room by a distance, it needs no services, and it is where people actually sit. If you have a bay, a nook or a dead corner next to your kitchen, build into it.
Materials and finishes
What's in the room
- Cabinetry
- Sage green, flat panel, bar pull handles
- Splashback
- Dark green vertical stack-bond gloss tile
- Benchtops
- Cream stone, waterfall end to the island
- Island
- Retained position, new joinery and stone
- Sink
- Undermount
- Tapware
- Brushed gooseneck pull-down mixer
- Cooktop
- Black glass, integrated oven
- Extraction
- Ducted through the ceiling to outside
- Lighting
- LED strip concealed under the uppers
- Window seat
- Built in, storage beneath
- Flooring
- Existing timber, retained and protected throughout
- Scope
- Full replacement, existing footprint, no structural work
Finished
Merani Street, Belmont
Common questions
Planning a kitchen renovation in Auckland
Do you have to change the layout to modernise a kitchen?
Usually not. Merani Street did not move a wall, did not extend and kept the island where it was. If the layout works and the light is good, the dated feeling is coming from the surfaces and the colour, not the plan. Changing the plan is where the cost and the consent risk live, so it is worth testing whether you actually need to.
Can you keep the existing floor through a kitchen renovation?
Often yes, and it is one of the better savings available. The timber floor here was protected through demolition and the whole build and it stayed. Keeping a floor that is already good means no sanding, no re-coating and no delay while it cures, and the money goes into joinery and stone instead.
Does a kitchen renovation need council consent in Auckland?
Replacing joinery, benchtops and finishes in the same footprint generally does not. Moving walls, altering structure or relocating drainage and gas can change that. We work it out at design stage rather than mid-build. Confirm with Auckland Council for your specific property.
Should the rangehood be ducted or recirculating?
Ducted to outside wherever it can be done, as it was here, through the ceiling and out. A recirculating hood filters grease but returns the heat and most of the smell to the room. In an open-plan kitchen that means the whole living space wears every meal.
What does a kitchen renovation cost in Auckland?
Layout is the biggest lever, then joinery, then stone. A same-footprint replacement and a reconfiguration are different numbers entirely. We have written the detail up separately: see what a kitchen renovation costs in Auckland, or get a tailored figure from the estimator.
Do you work in Belmont and on the North Shore?
Yes. Key Interiors design and build kitchens, bathrooms, laundries and full home renovations across Auckland, including Belmont, Bayswater, Devonport, Takapuna and Milford. See the areas we serve.
Keep reading
Planning a kitchen renovation?
Get a free, tailored estimate using real Auckland pricing. No obligation, no sales pressure.
Get my free estimate or book a free consult